By creating a Certificate Authority (a.k.a., a “CA”) and trusting it locally, any certificate that we create using this CA will also be trusted locally. This can simplify the development of HTTPS websites on your local machine.

Create a local Certificate Authority
Start by opening Keychain Access. You can either search for it inside Spotlight, or you can traverse the file system for Computer → Applications → Utilities → Keychain Access.
Open the Certificate Assistant
Go to the Keychain Access menu, and choose Certificate Assistant → Create a Certificate Authority….
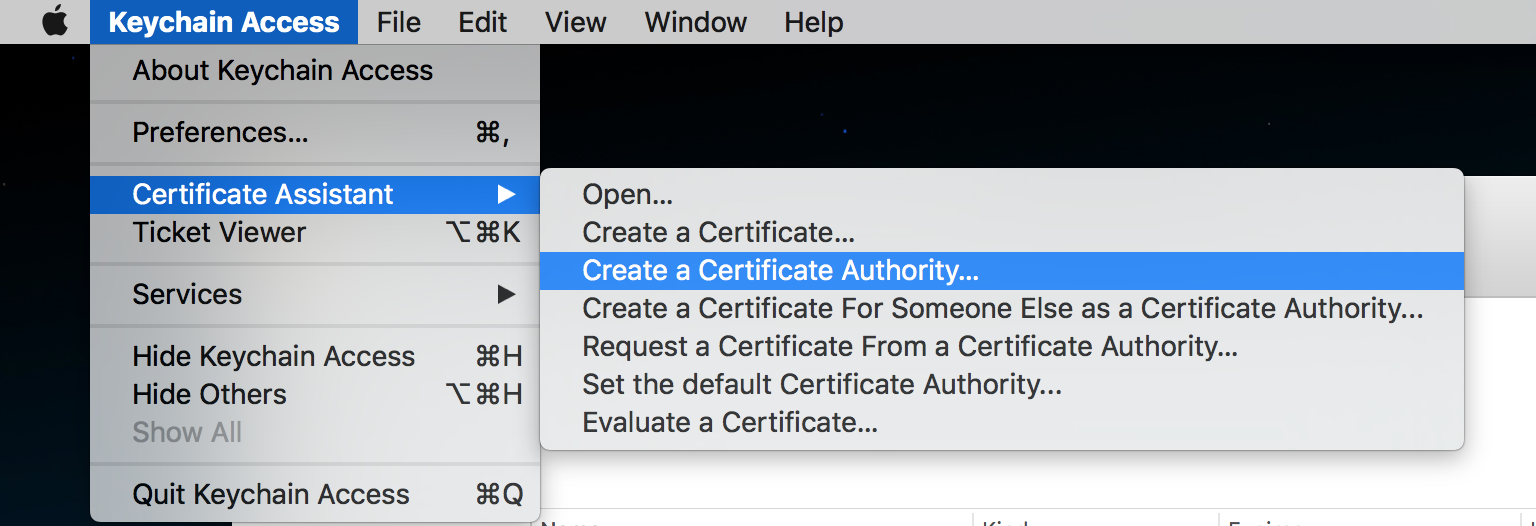
You should see the new Certificate Assistant.
Enter the Values
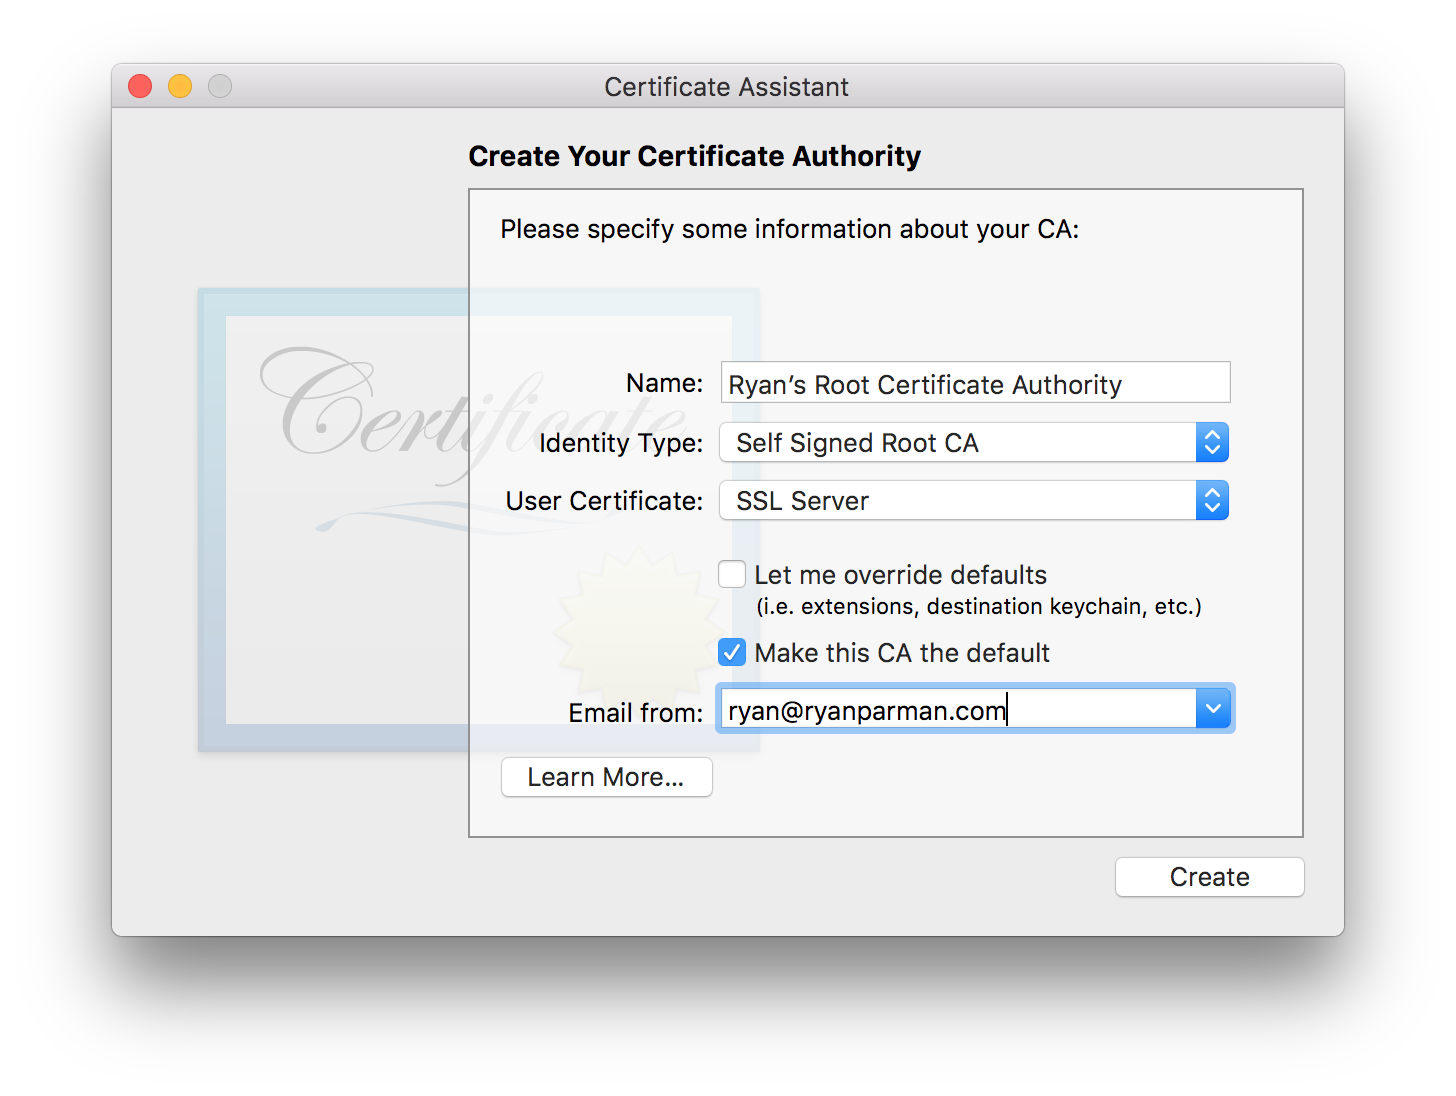
- Give it a name.
- Identity Type should be Self Signed Root CA.
- User Certificate should be SSL Server.
- Let me override defaults should be unchecked.
- Make this CA the default is optional.
- Add your email address.
When you’re done, choose the Create button.
Created!
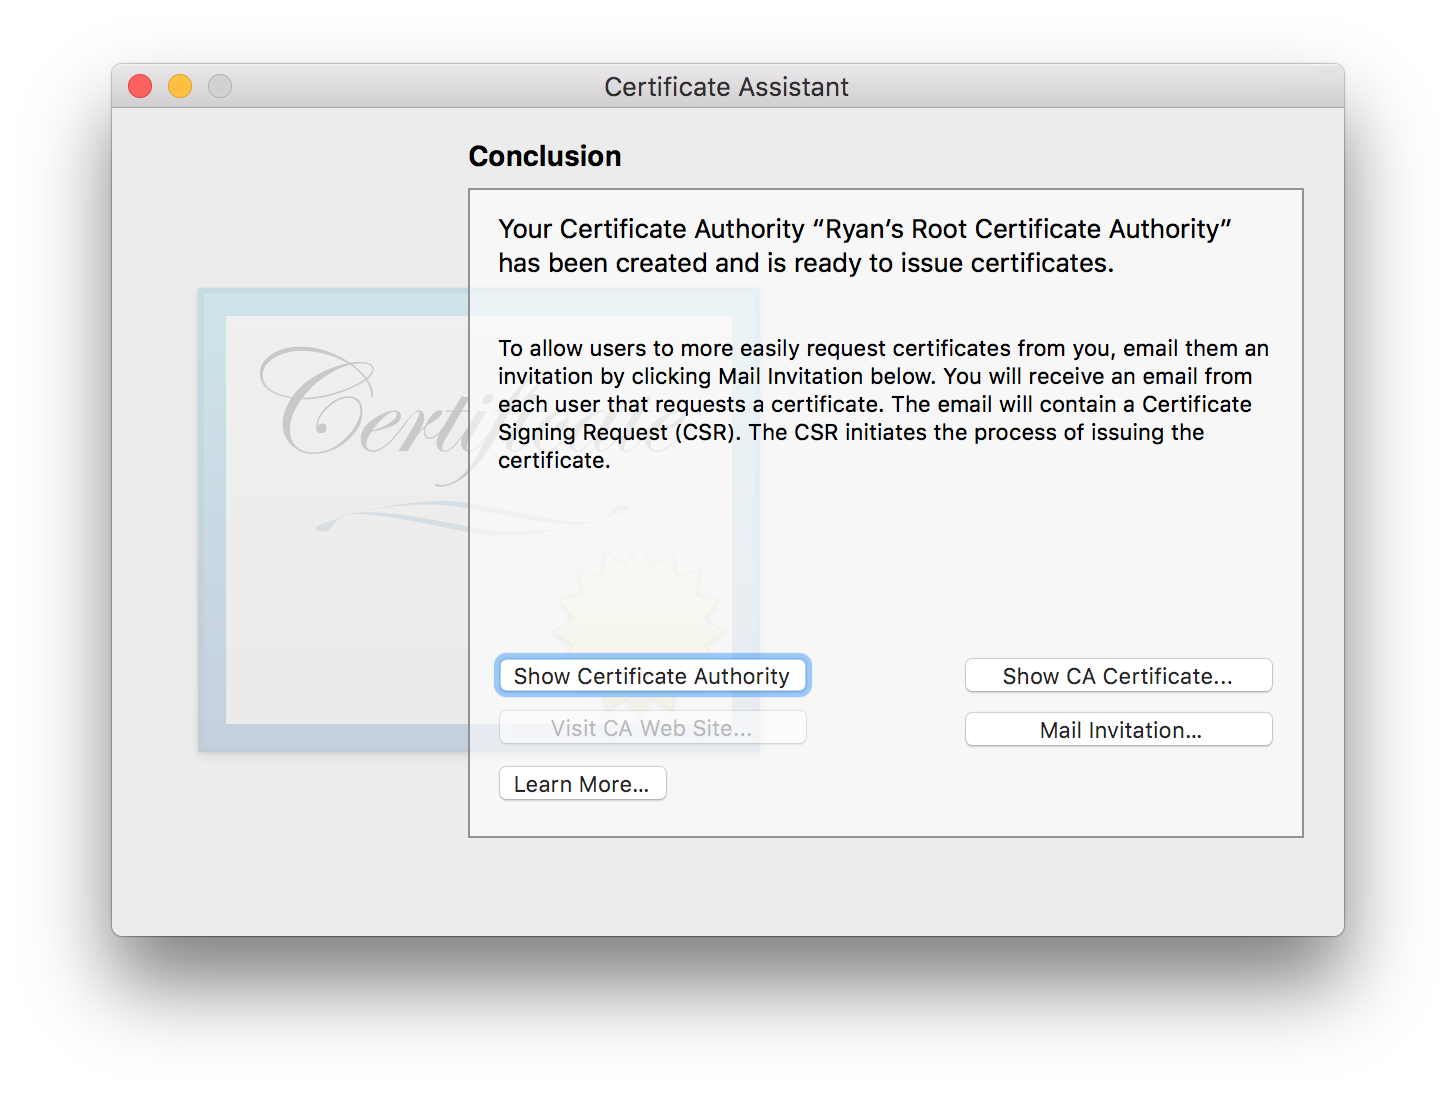
All done! Feel free to close this window.
Trust the New CA
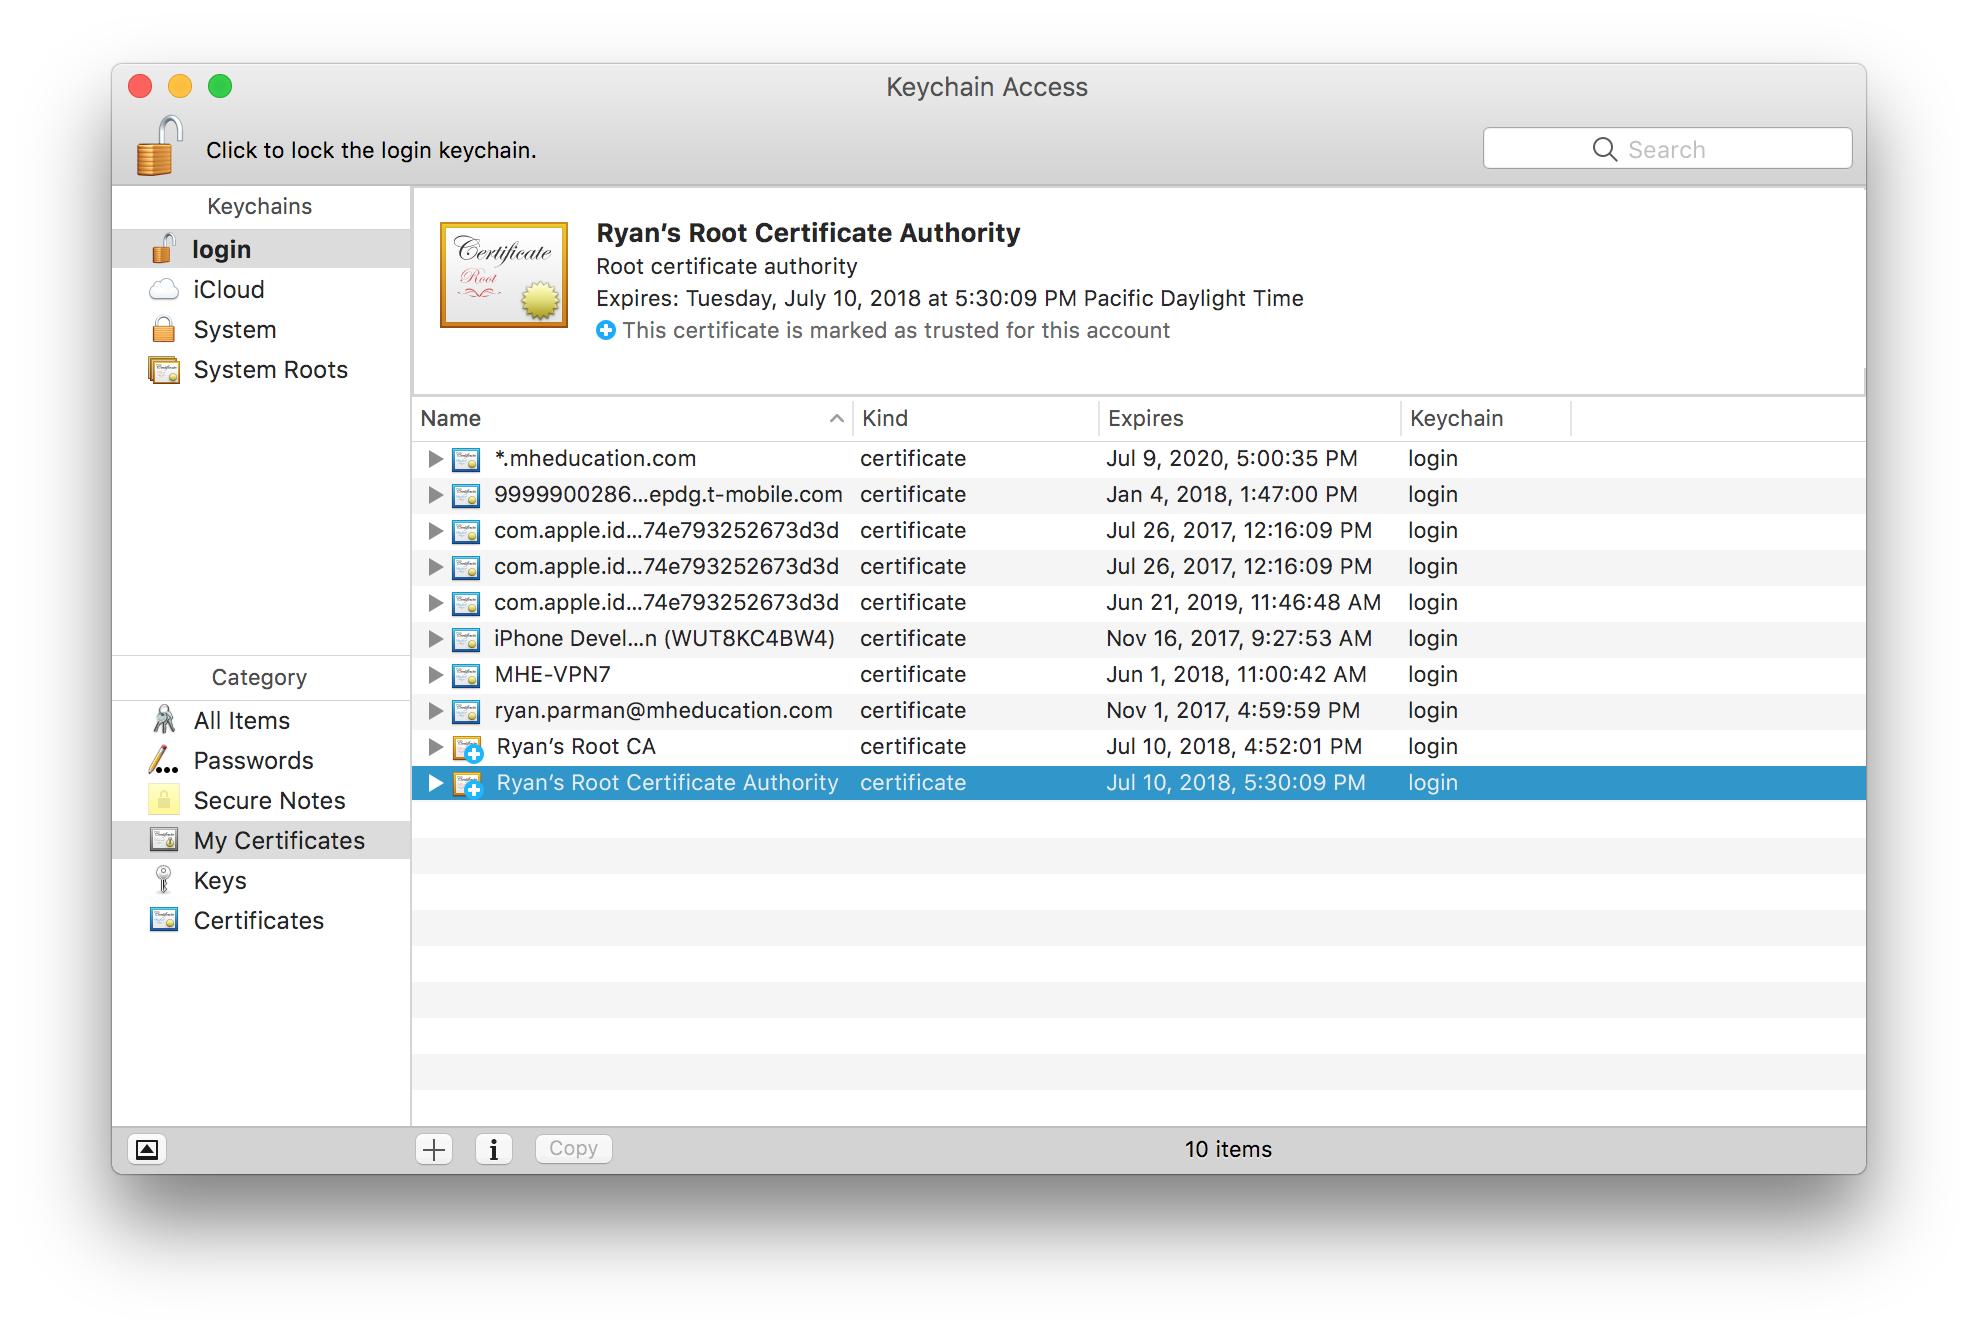
Now, you should be looking at your Keychain. Select My Certificates from the sidebar to filter down the list to what we care about.
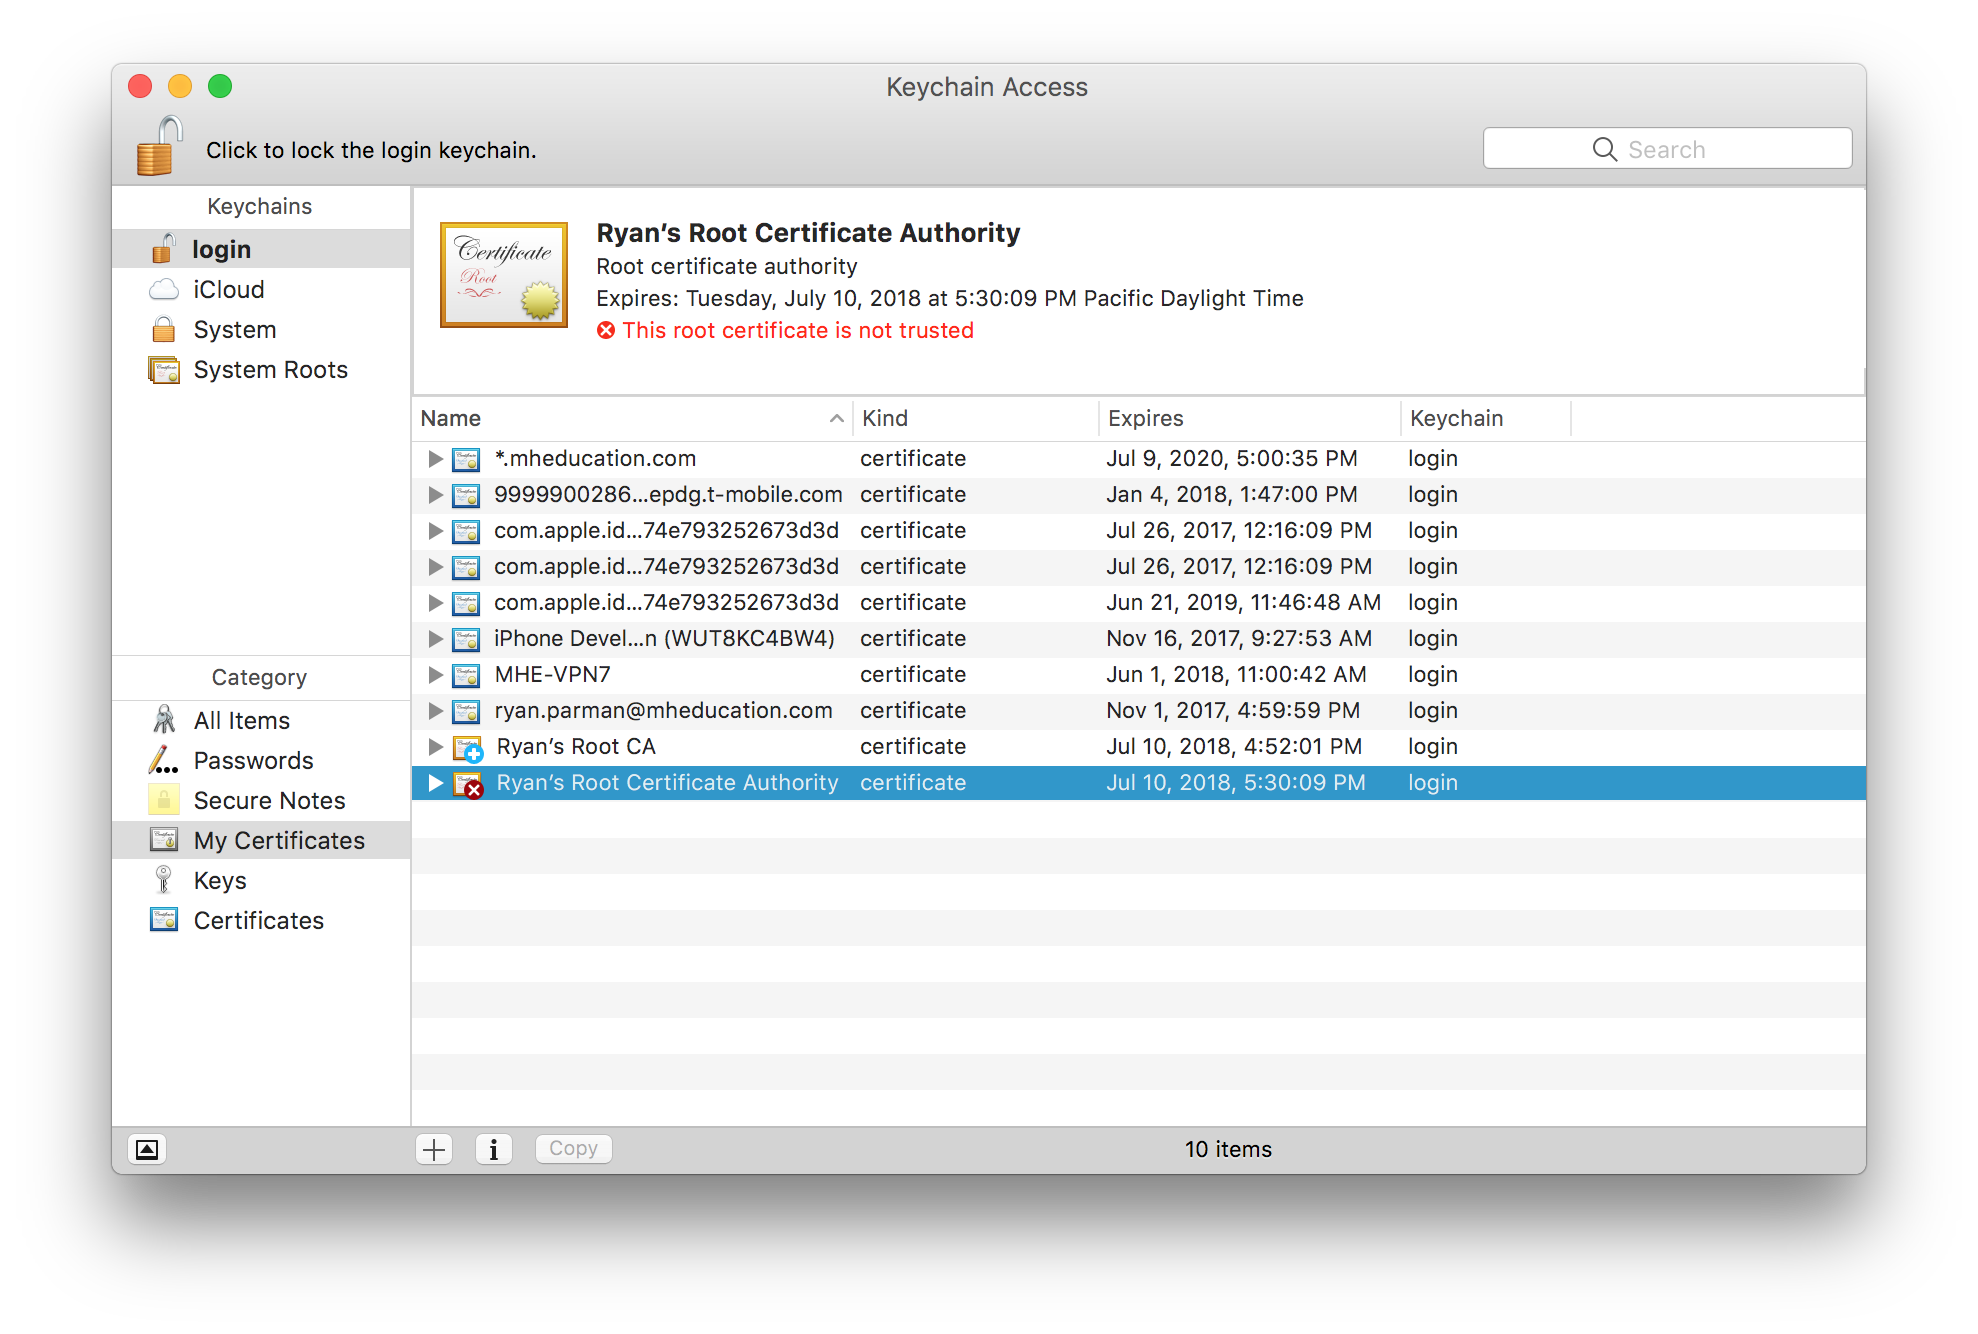
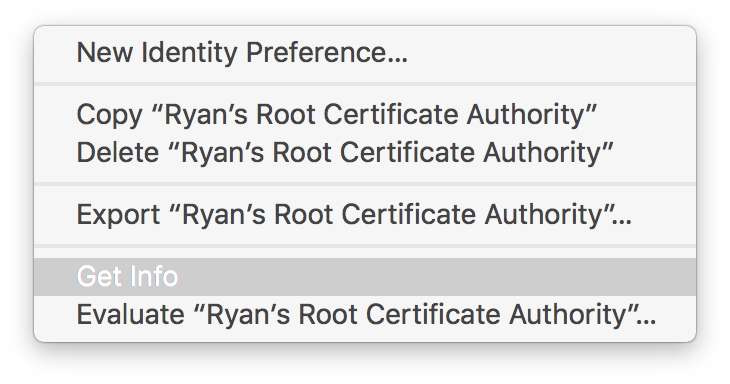
You’ll notice that, by default, our new CA is not trusted. Right-click (or control-click, or two-finger click) the new CA, and choose Get Info.
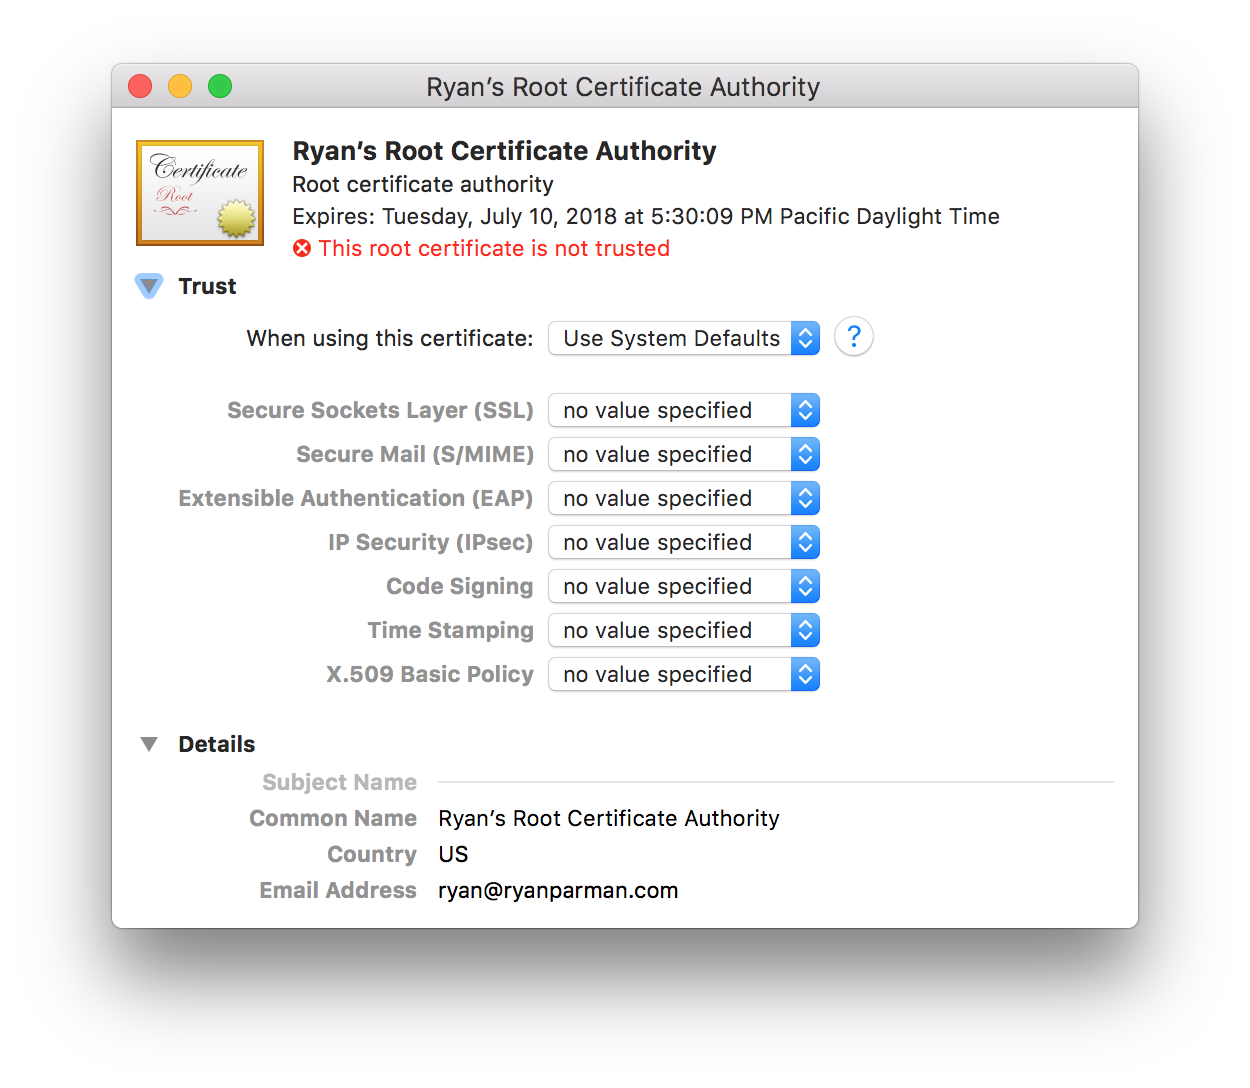
Make sure that the Trust section is visible. Click the small triangle if it isn’t.
You should see that the default settings are configured for System Defaults, and that “This root certificate is not trusted”.
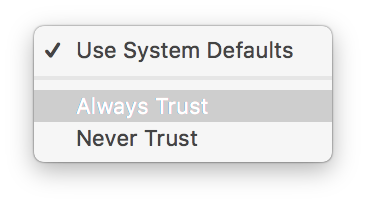
Next to When using this certificate:, open the pull-down menu and choose Always Trust.
All of the options should now flip to Always Trust.
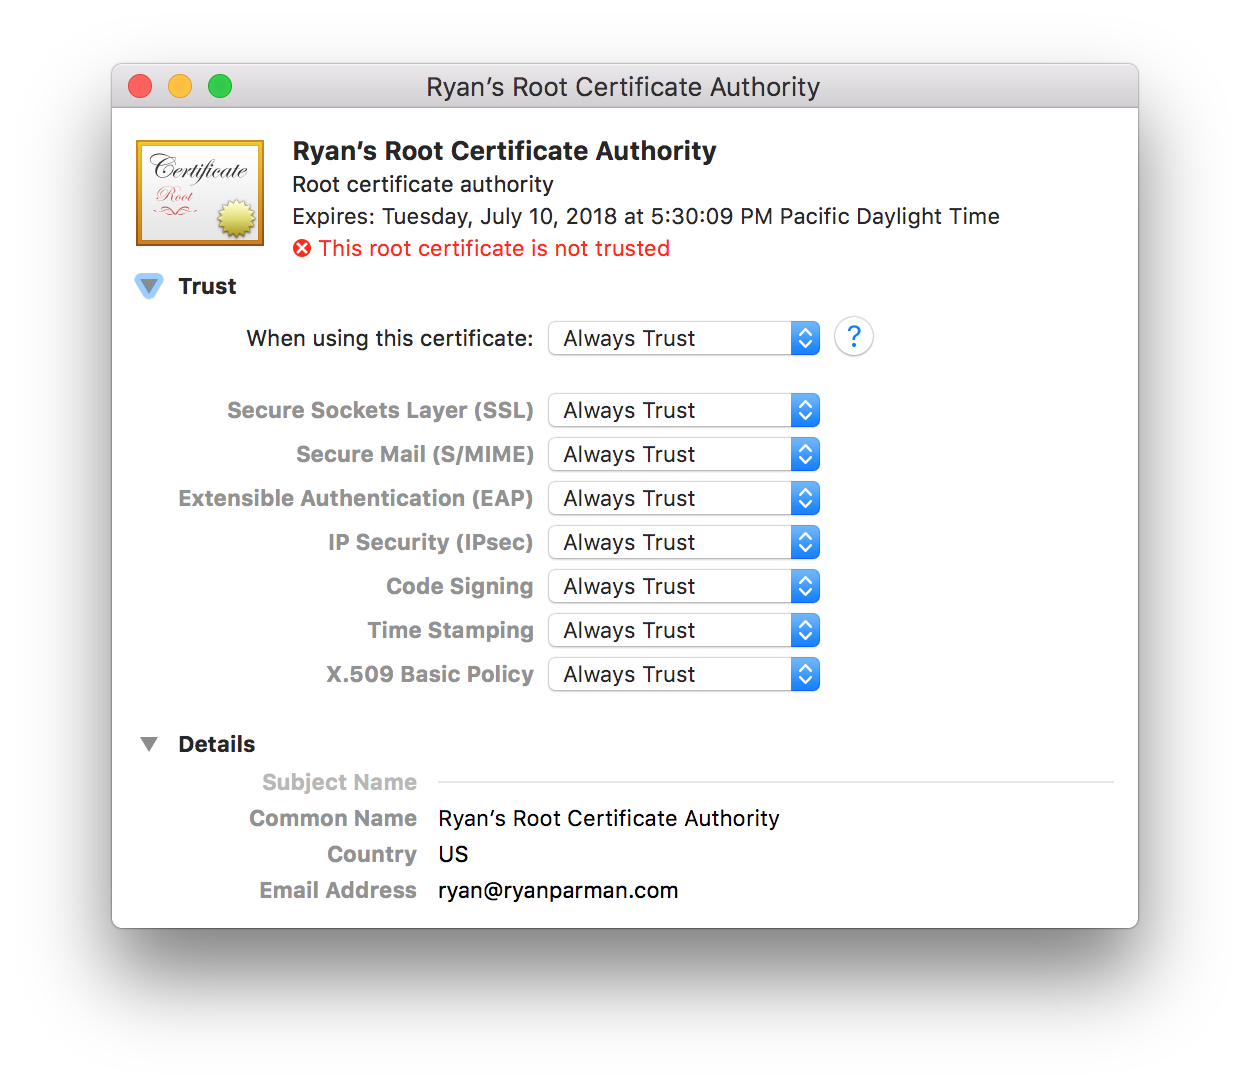
But we’re not quite done! When we close the window, we’ll be asked for our system password. You need to provide your password correctly before the settings will take effect.
Create a local Certificate from your new Certificate Authority
Open the Certificate Assistant
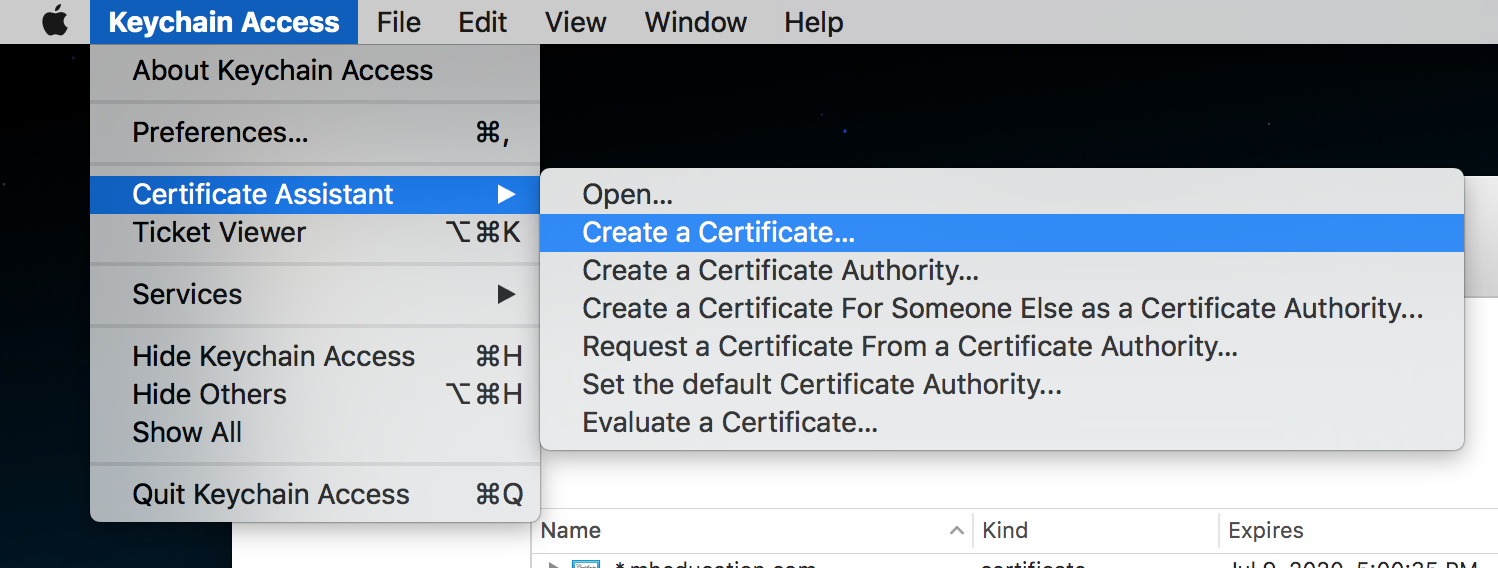
Create your Certificate
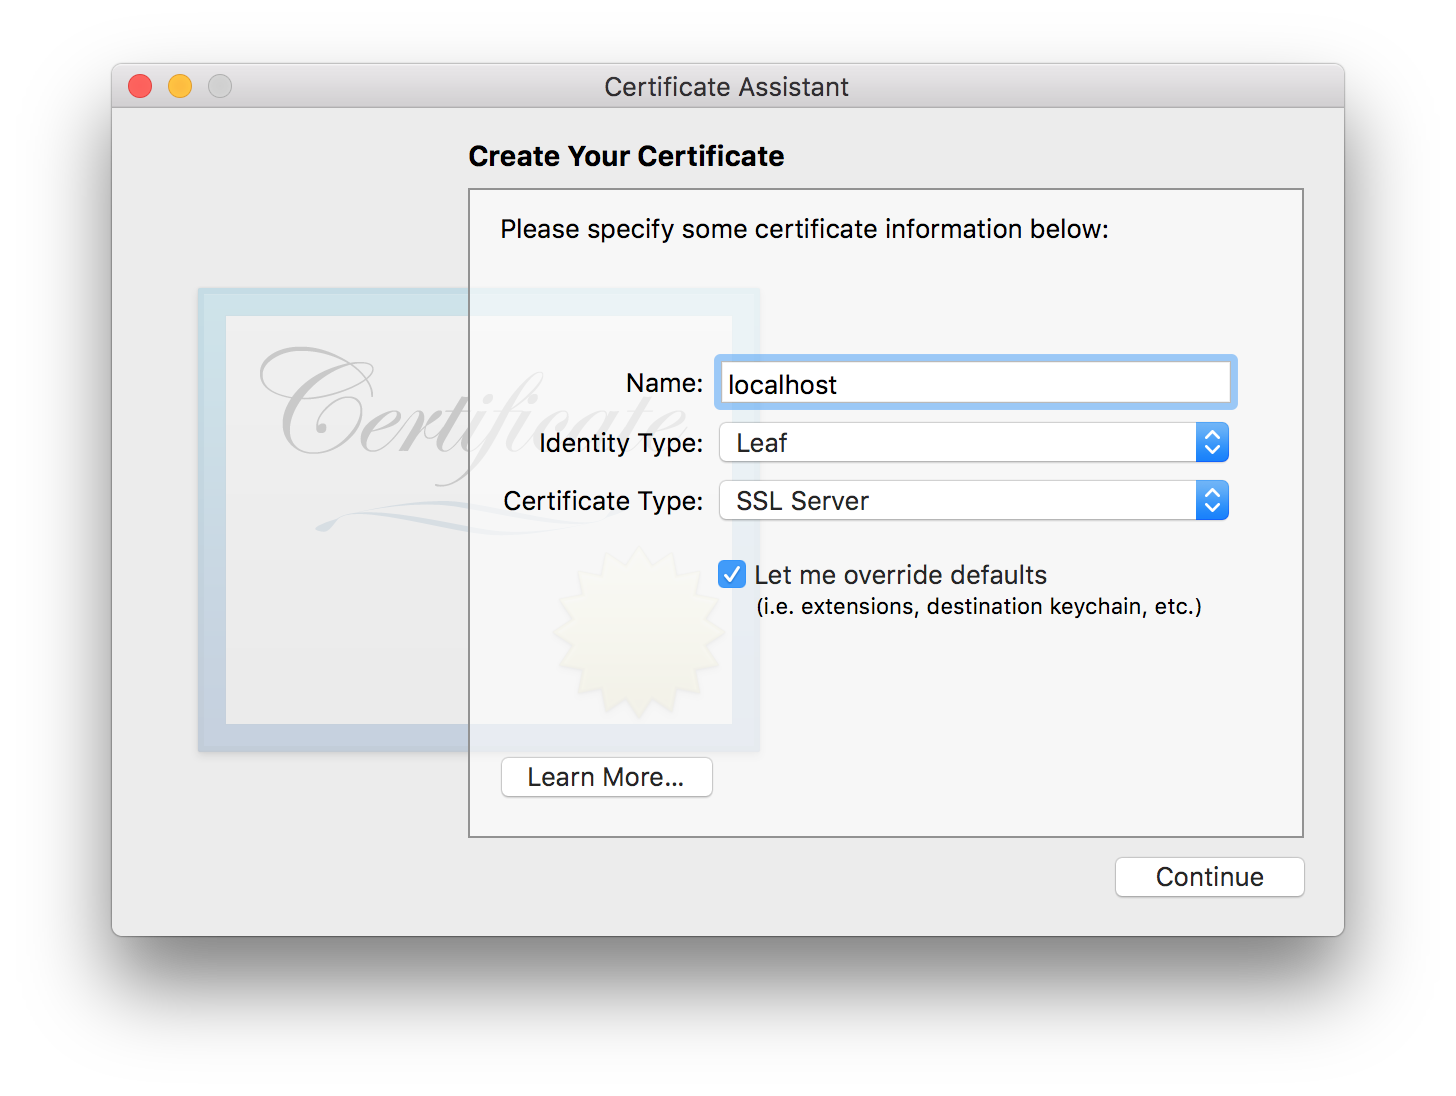
- Name should be the hostname you want to create the certificate for (e.g.,
localhost,*.google.com). - Identity Type should be Leaf.
- Certificate Type should be SSL Server.
- Let me override defaults should be checked.
When you’re done, choose the Continue button.
Configuring Validity
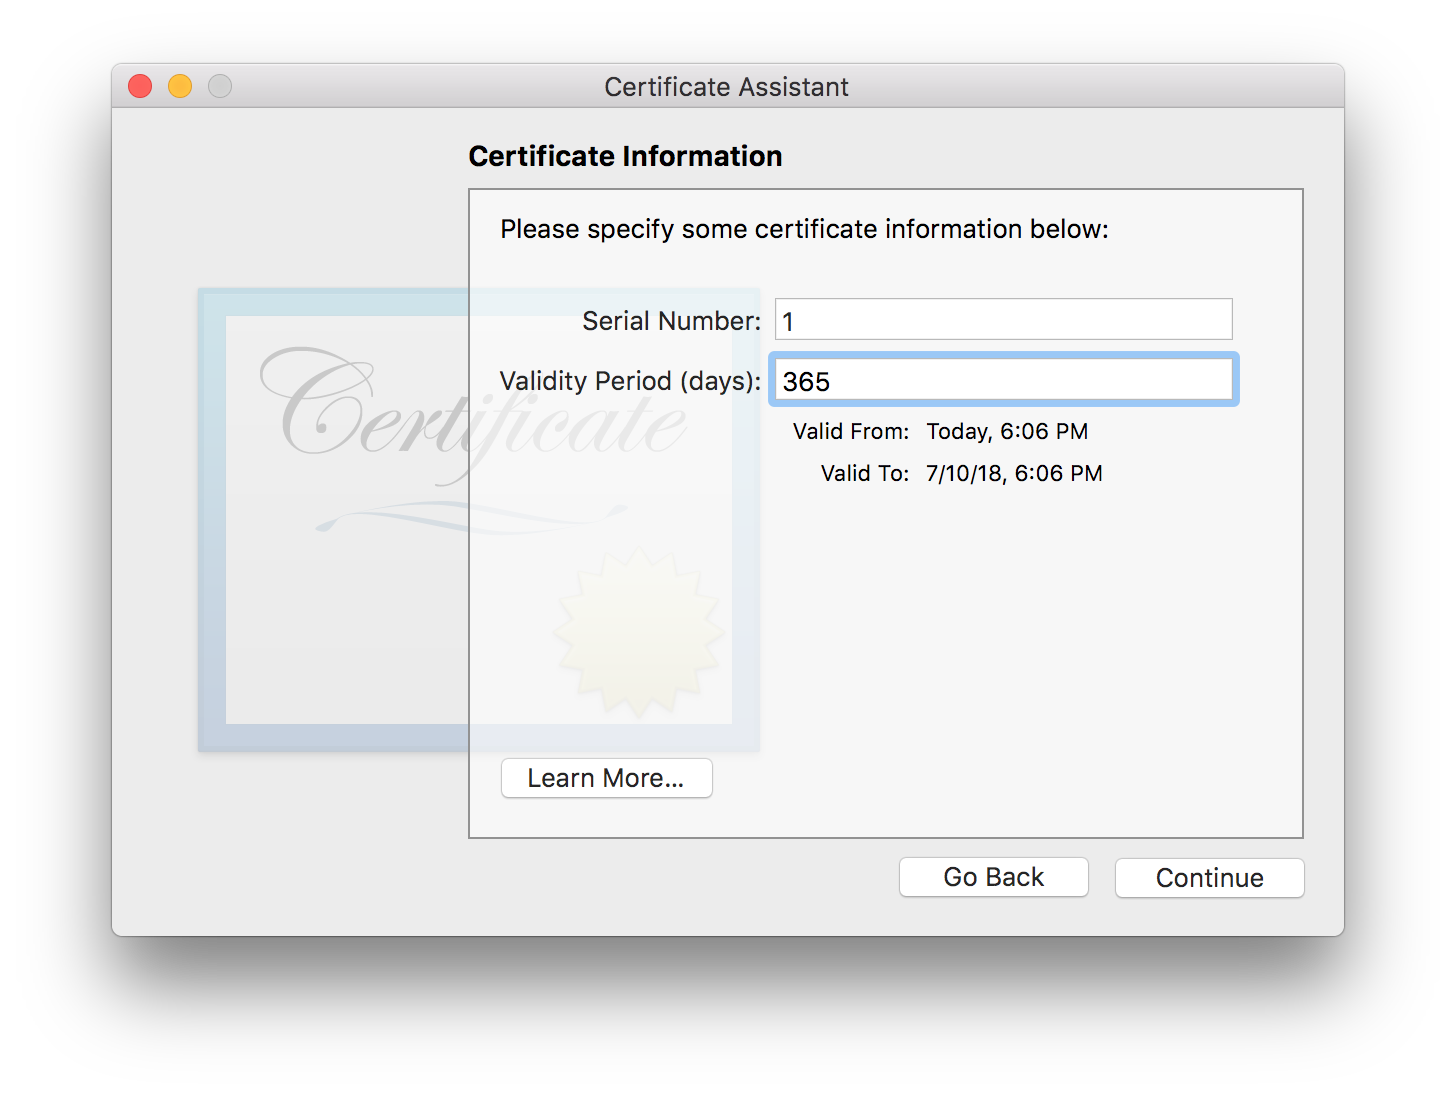
The default Validity Period is 365 days. You could also set it to 2 years (730 days), 3 years (1095 days), or any amount you want. (This is a local-only certificate, after all.)
When you’re done, choose the Continue button.
Configuring the Organizational Unit
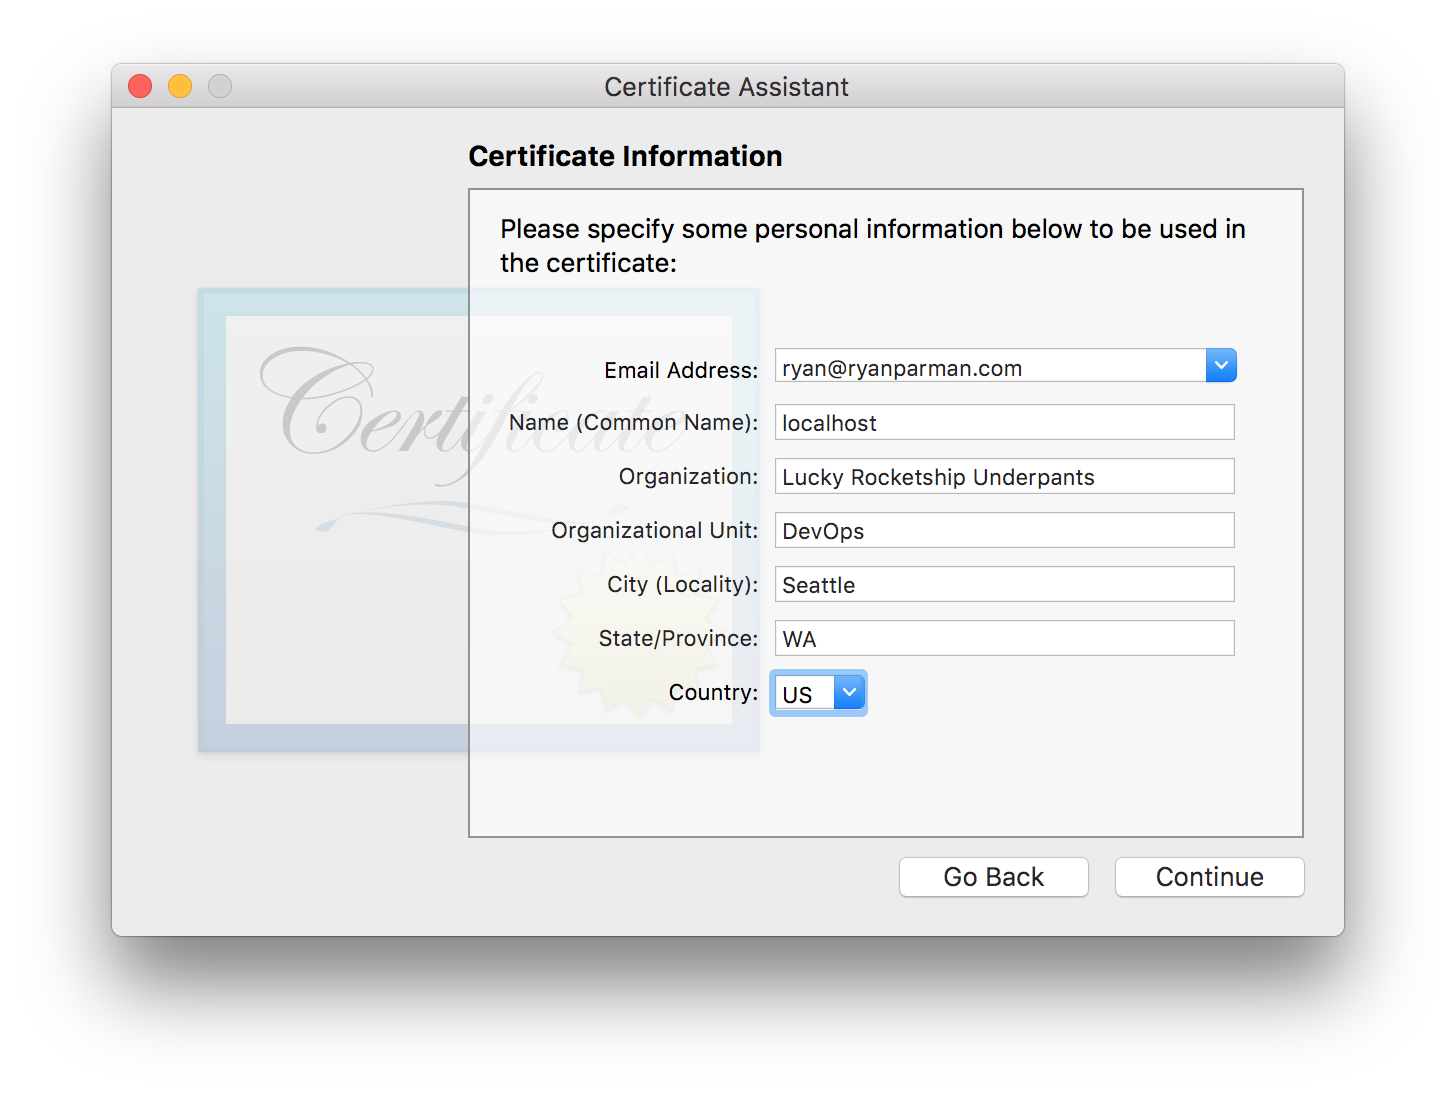
- Email Address should be your email address. Again, this is a local-only certificate, so this is generally unimportant.
- Name (Common Name) should be the hostname you want to create the certificate for (e.g.,
localhost,*.google.com). - Organization should be your company or organization.
- Organizational Unit is a smaller group inside of your company or organization.
- City, State, Country should all be self-explanitory.
When you’re done, choose the Continue button.
Choose an Issuer
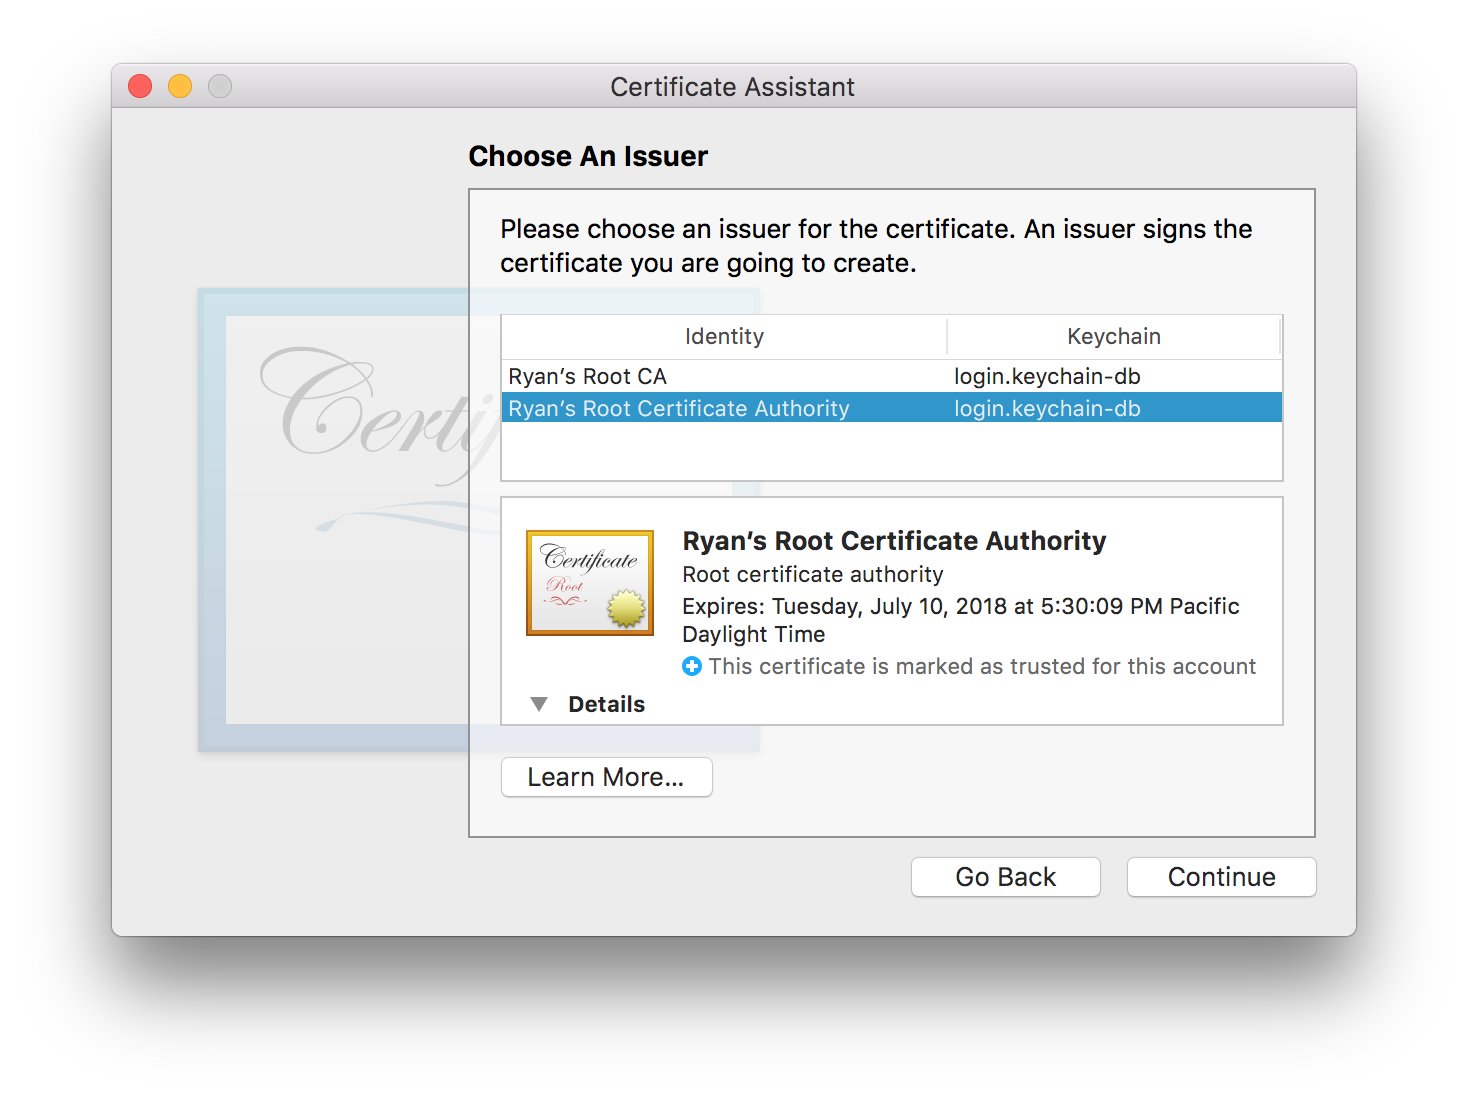
This should be the certificate authority that you created earlier.
When you’re done, choose the Continue button.
Key Pair Information
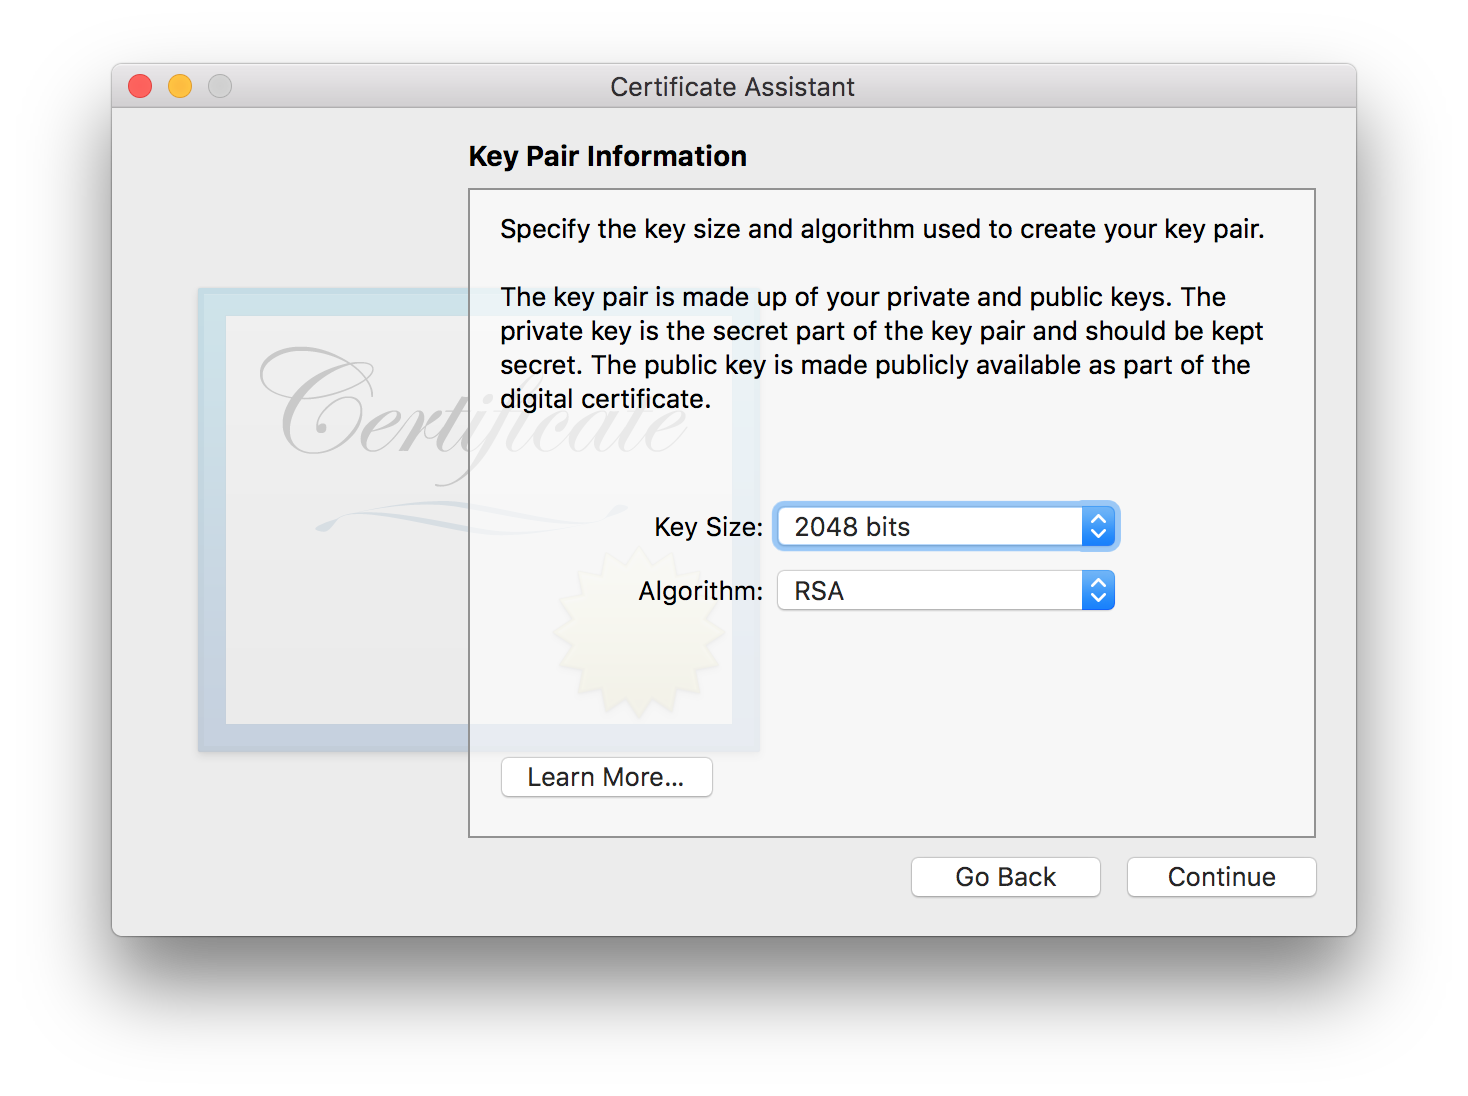
Leave this as-is. When you’re done, choose the Continue button.
Key Usage Extension
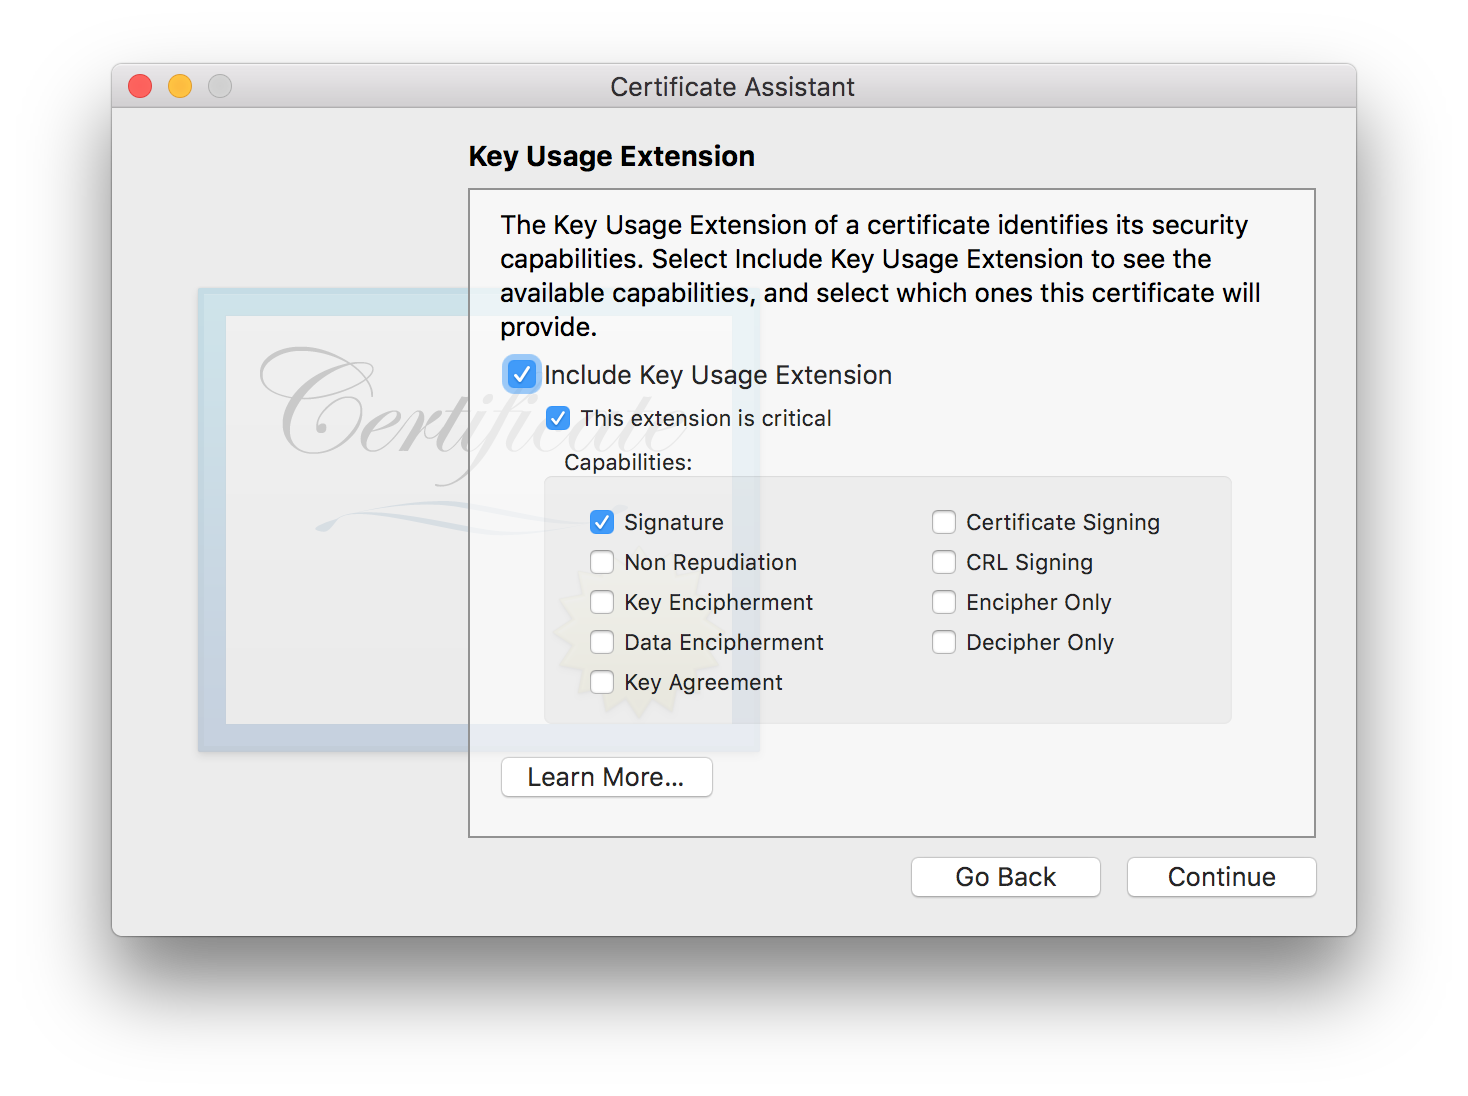
- Include Key Usage Extension should be checked.
- This extension is critical should be checked.
- Signature should be checked.
- Everything else should be unchecked.
When you’re done, choose the Continue button.
Extended Key Usage Extension
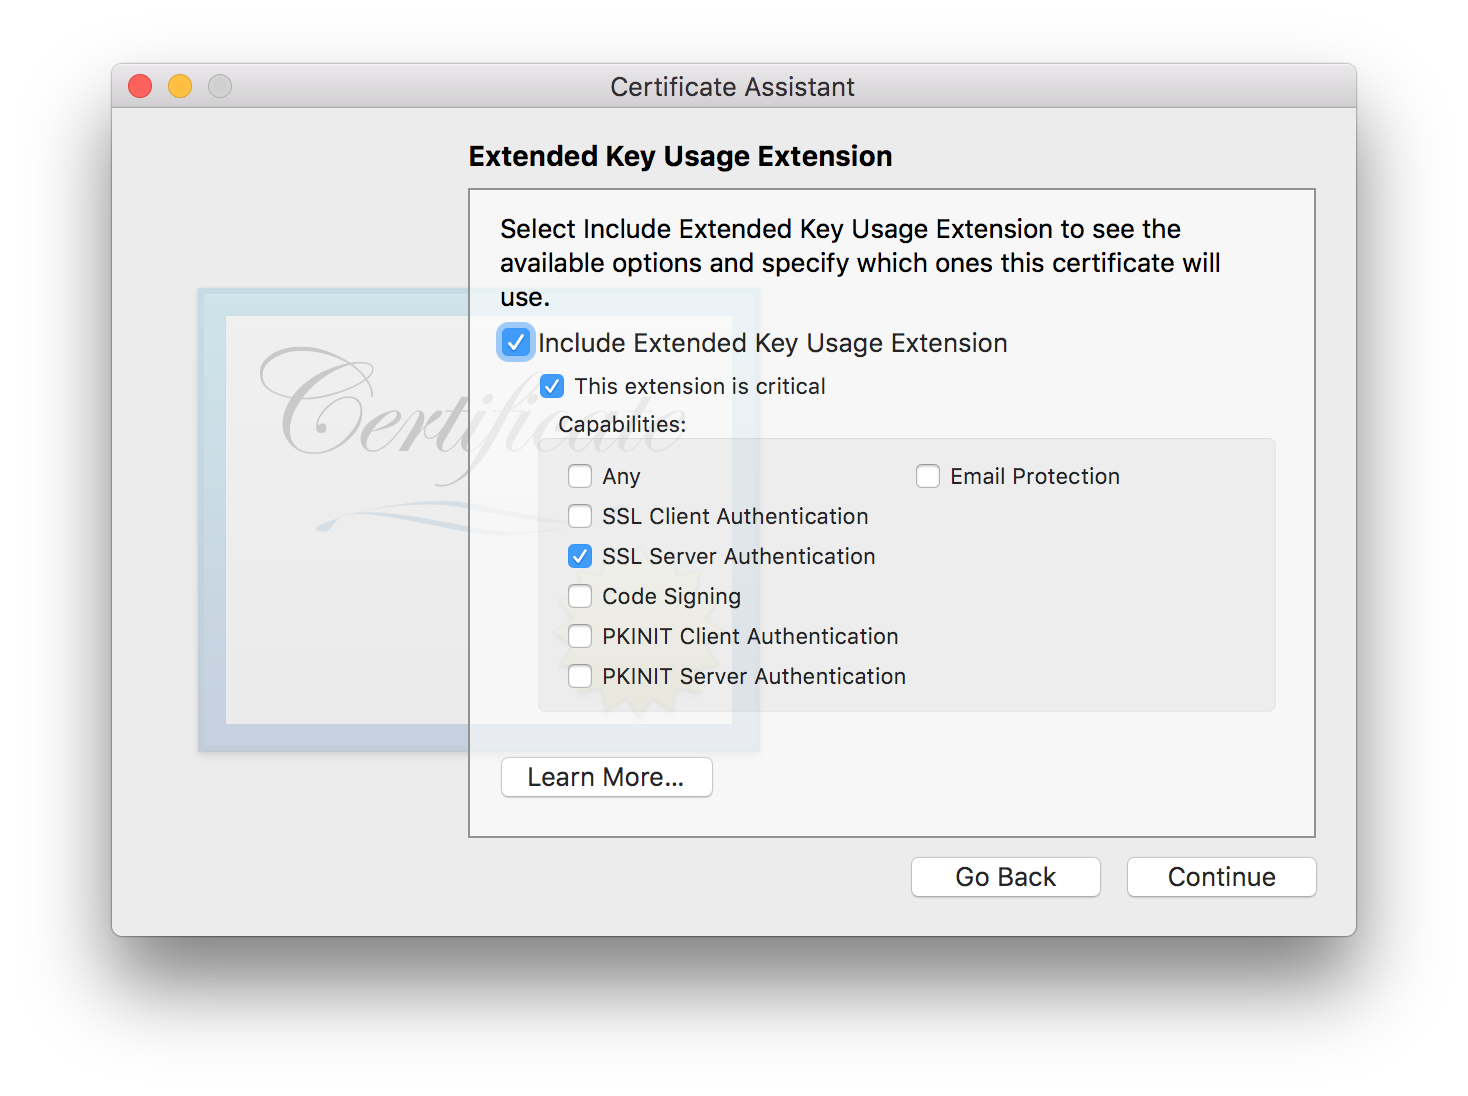
- Include Extended Key Usage Extension should be checked.
- This extension is critical should be checked.
- SSL Server Authentication should be checked.
- Everything else should be unchecked.
When you’re done, choose the Continue button.
Basic Constraints Extension
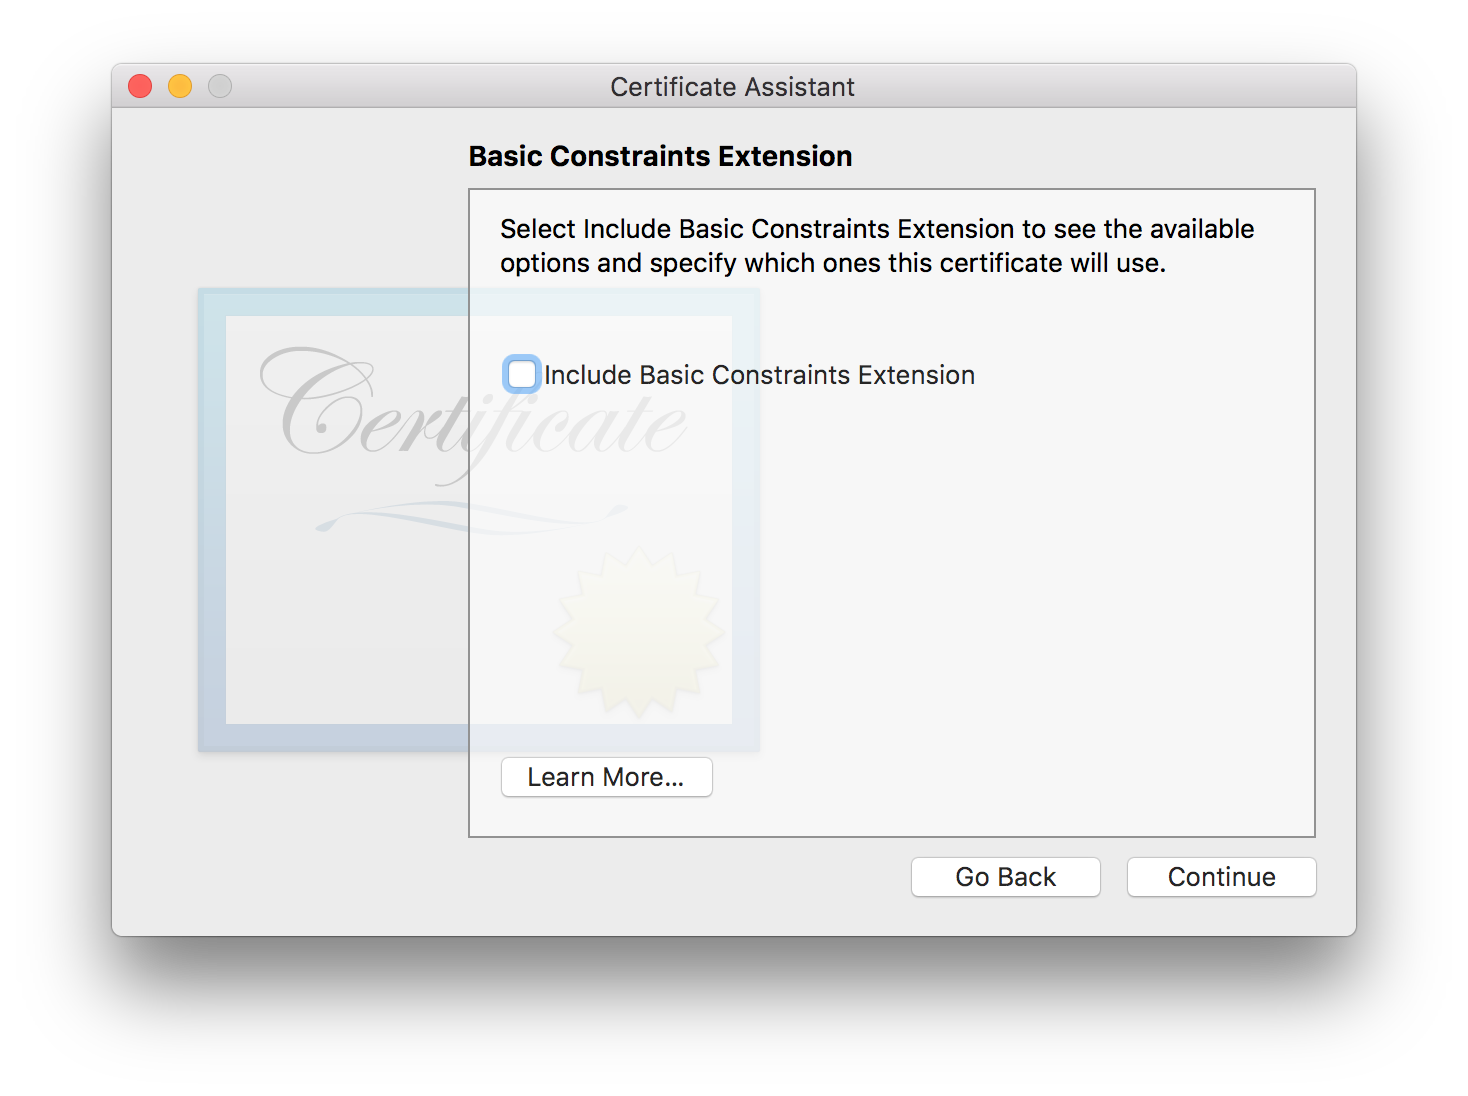
Leave this as-is. When you’re done, choose the Continue button.
Subject Alternate Name Extension
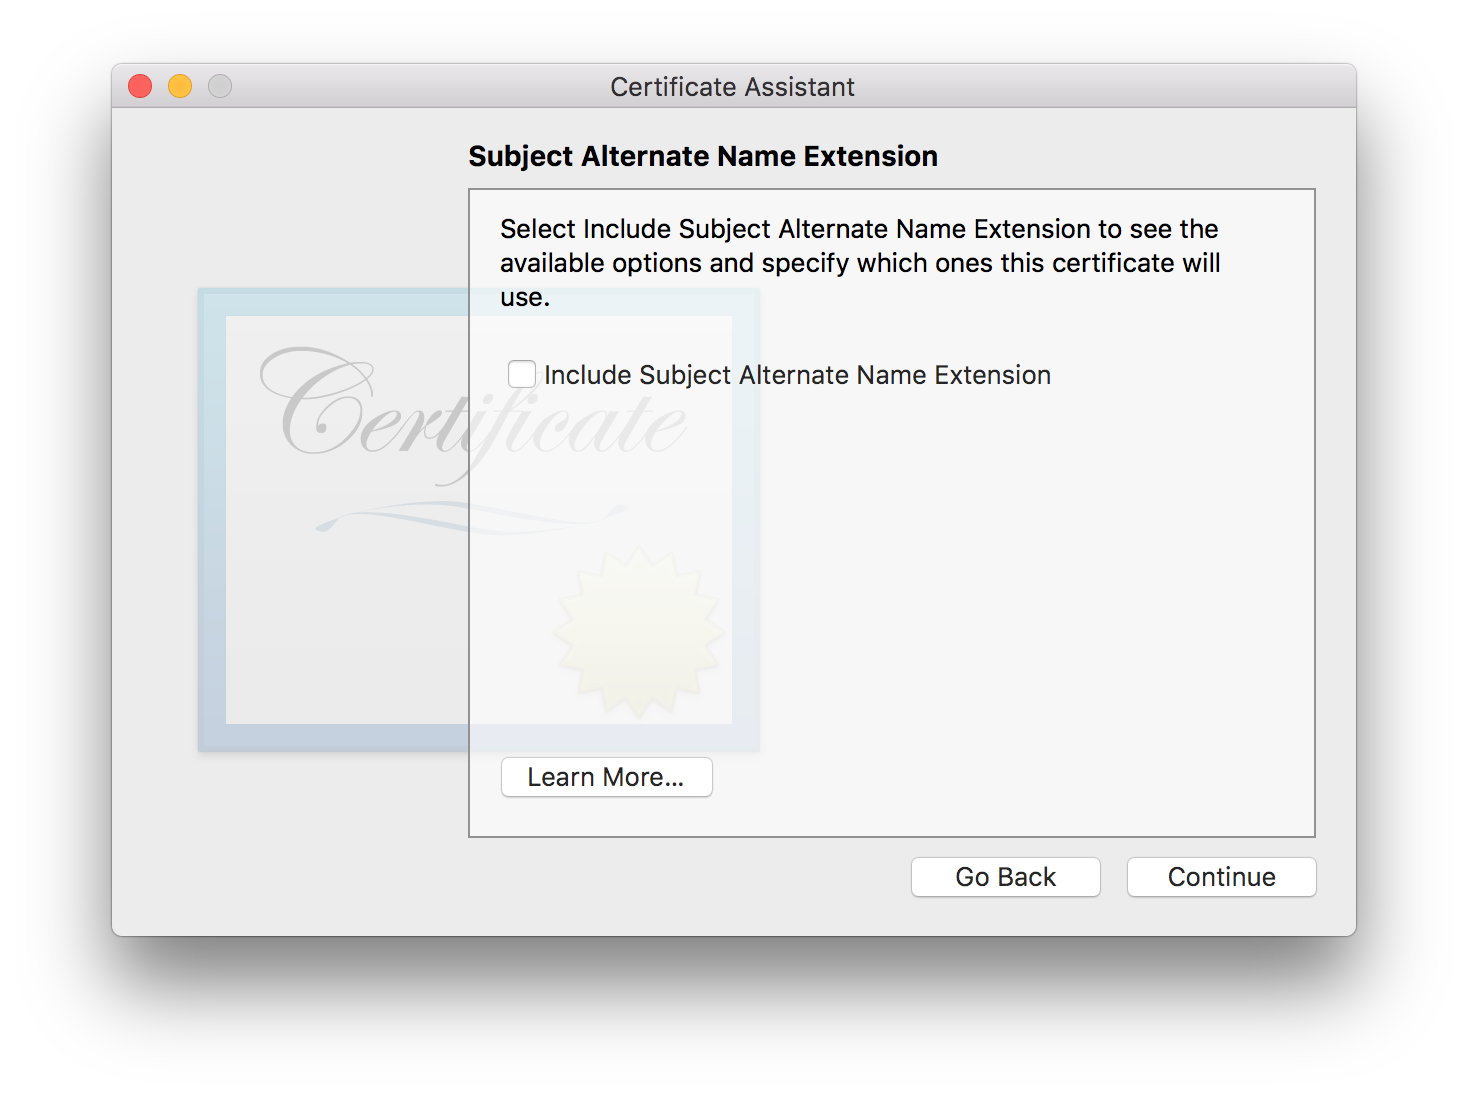
This should be disabled because we don’t need a SAN. If you encounter an error with this selection, you can enable it and set the dNSName value to the same thing as your Common Name was (e.g., localhost, *.google.com).
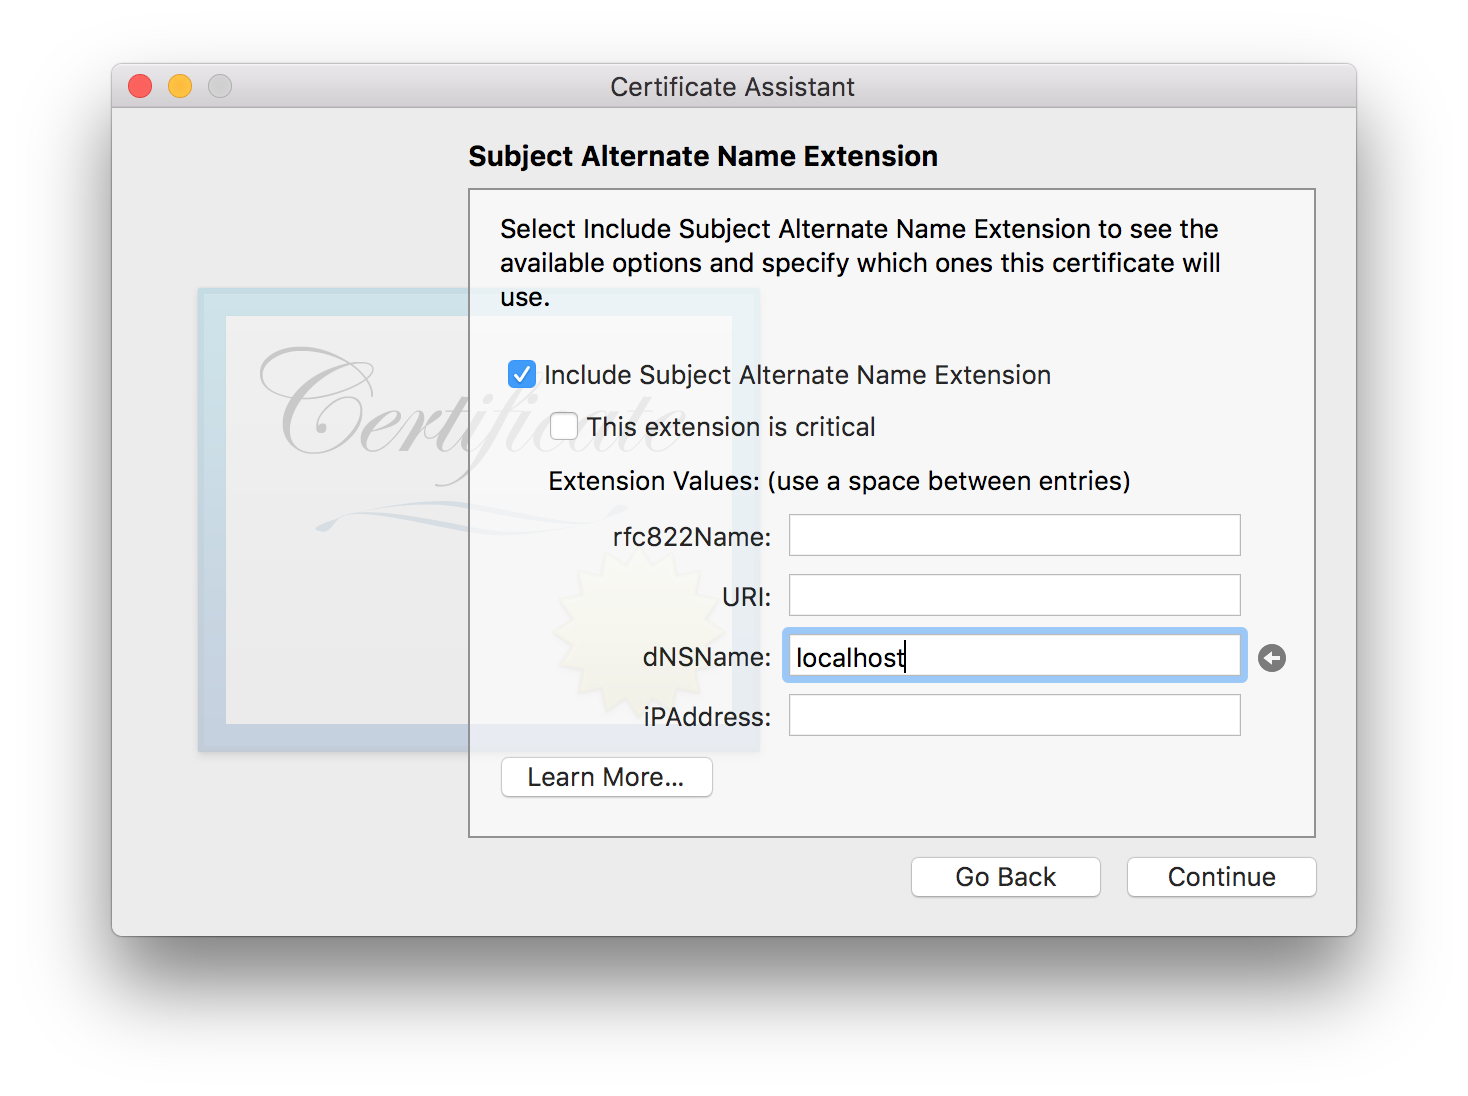
When you’re done, choose the Continue button.
Specify a Keychain Location for the Certificate
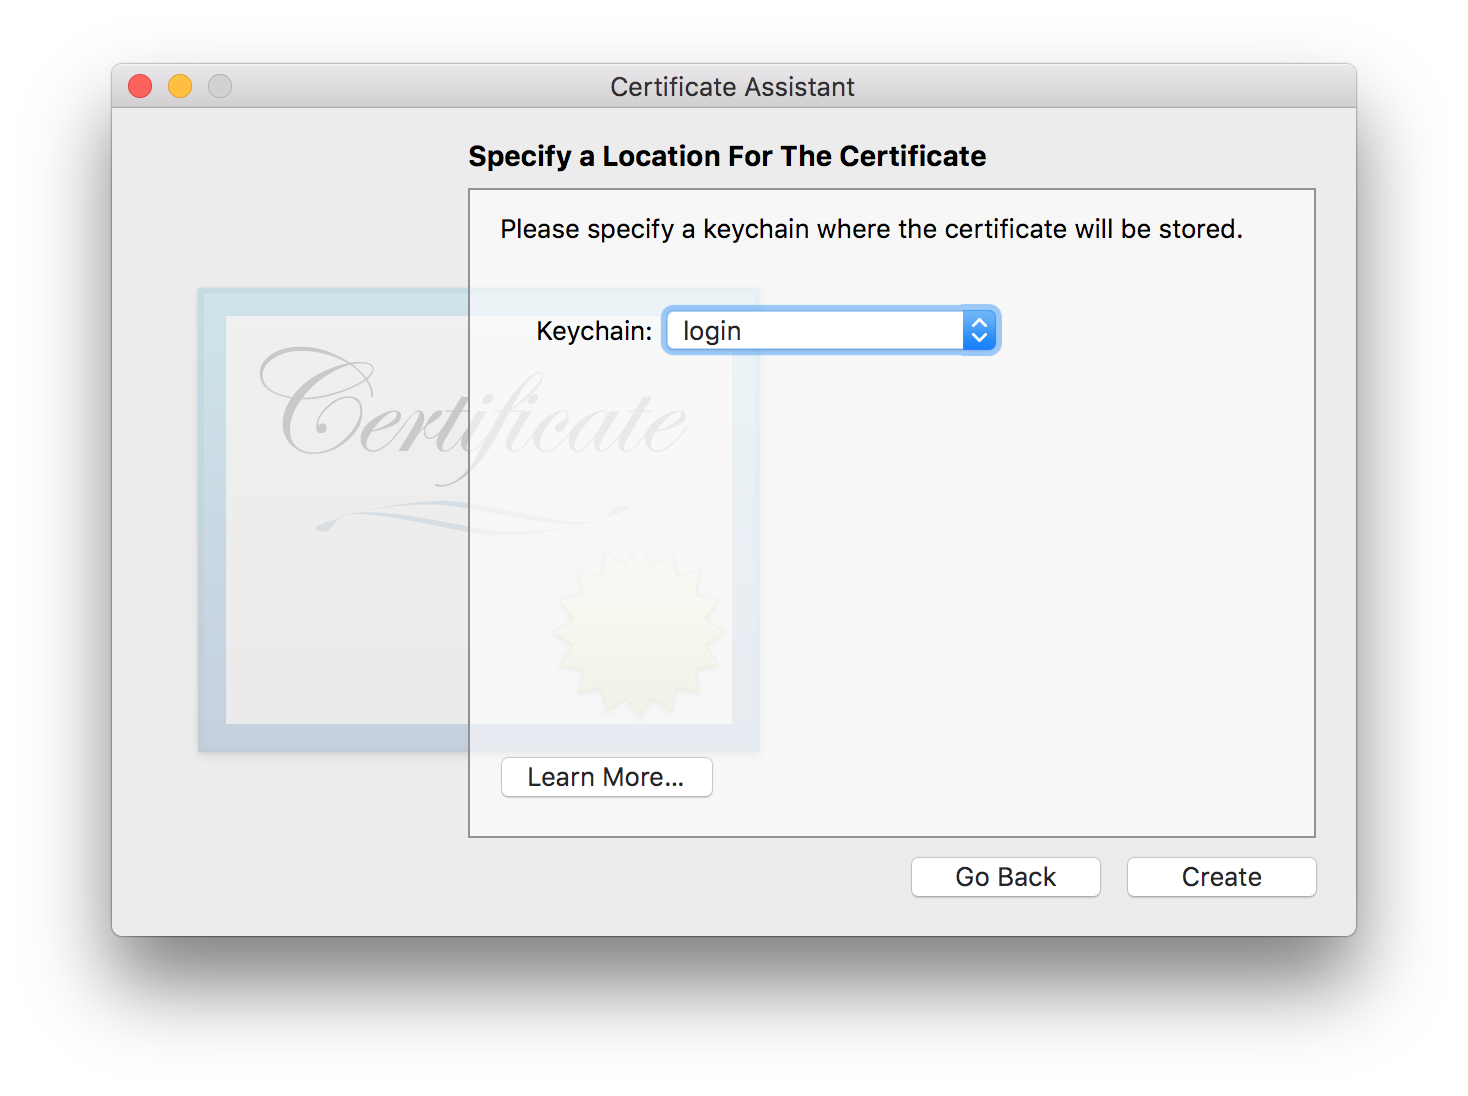
This should be your login keychain, which gets unlocked whenever you login.
When you’re done, choose the Continue button.
All Done!
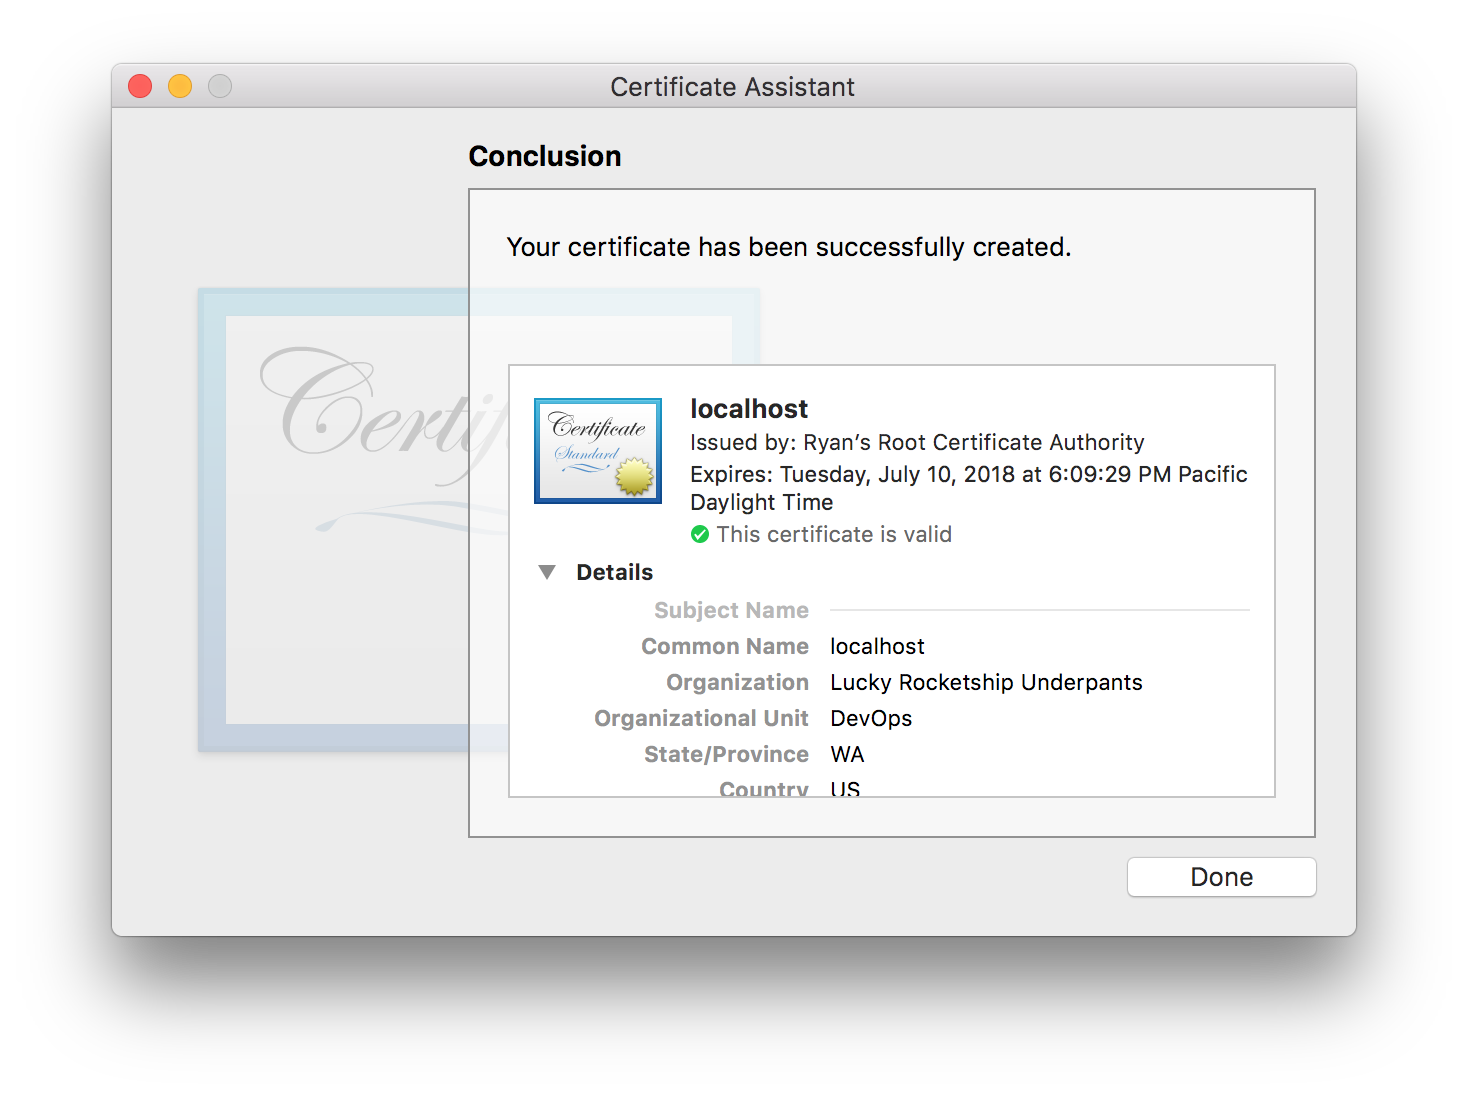
You should notice that since we trusted our custom CA, and we configured that CA as the Issuer for this certificate, that this certificate is already trusted by default.
When you’re done, choose the Done button.
Exporting your Keypair Files
Export your Root CA Certificate
Select your root CA.
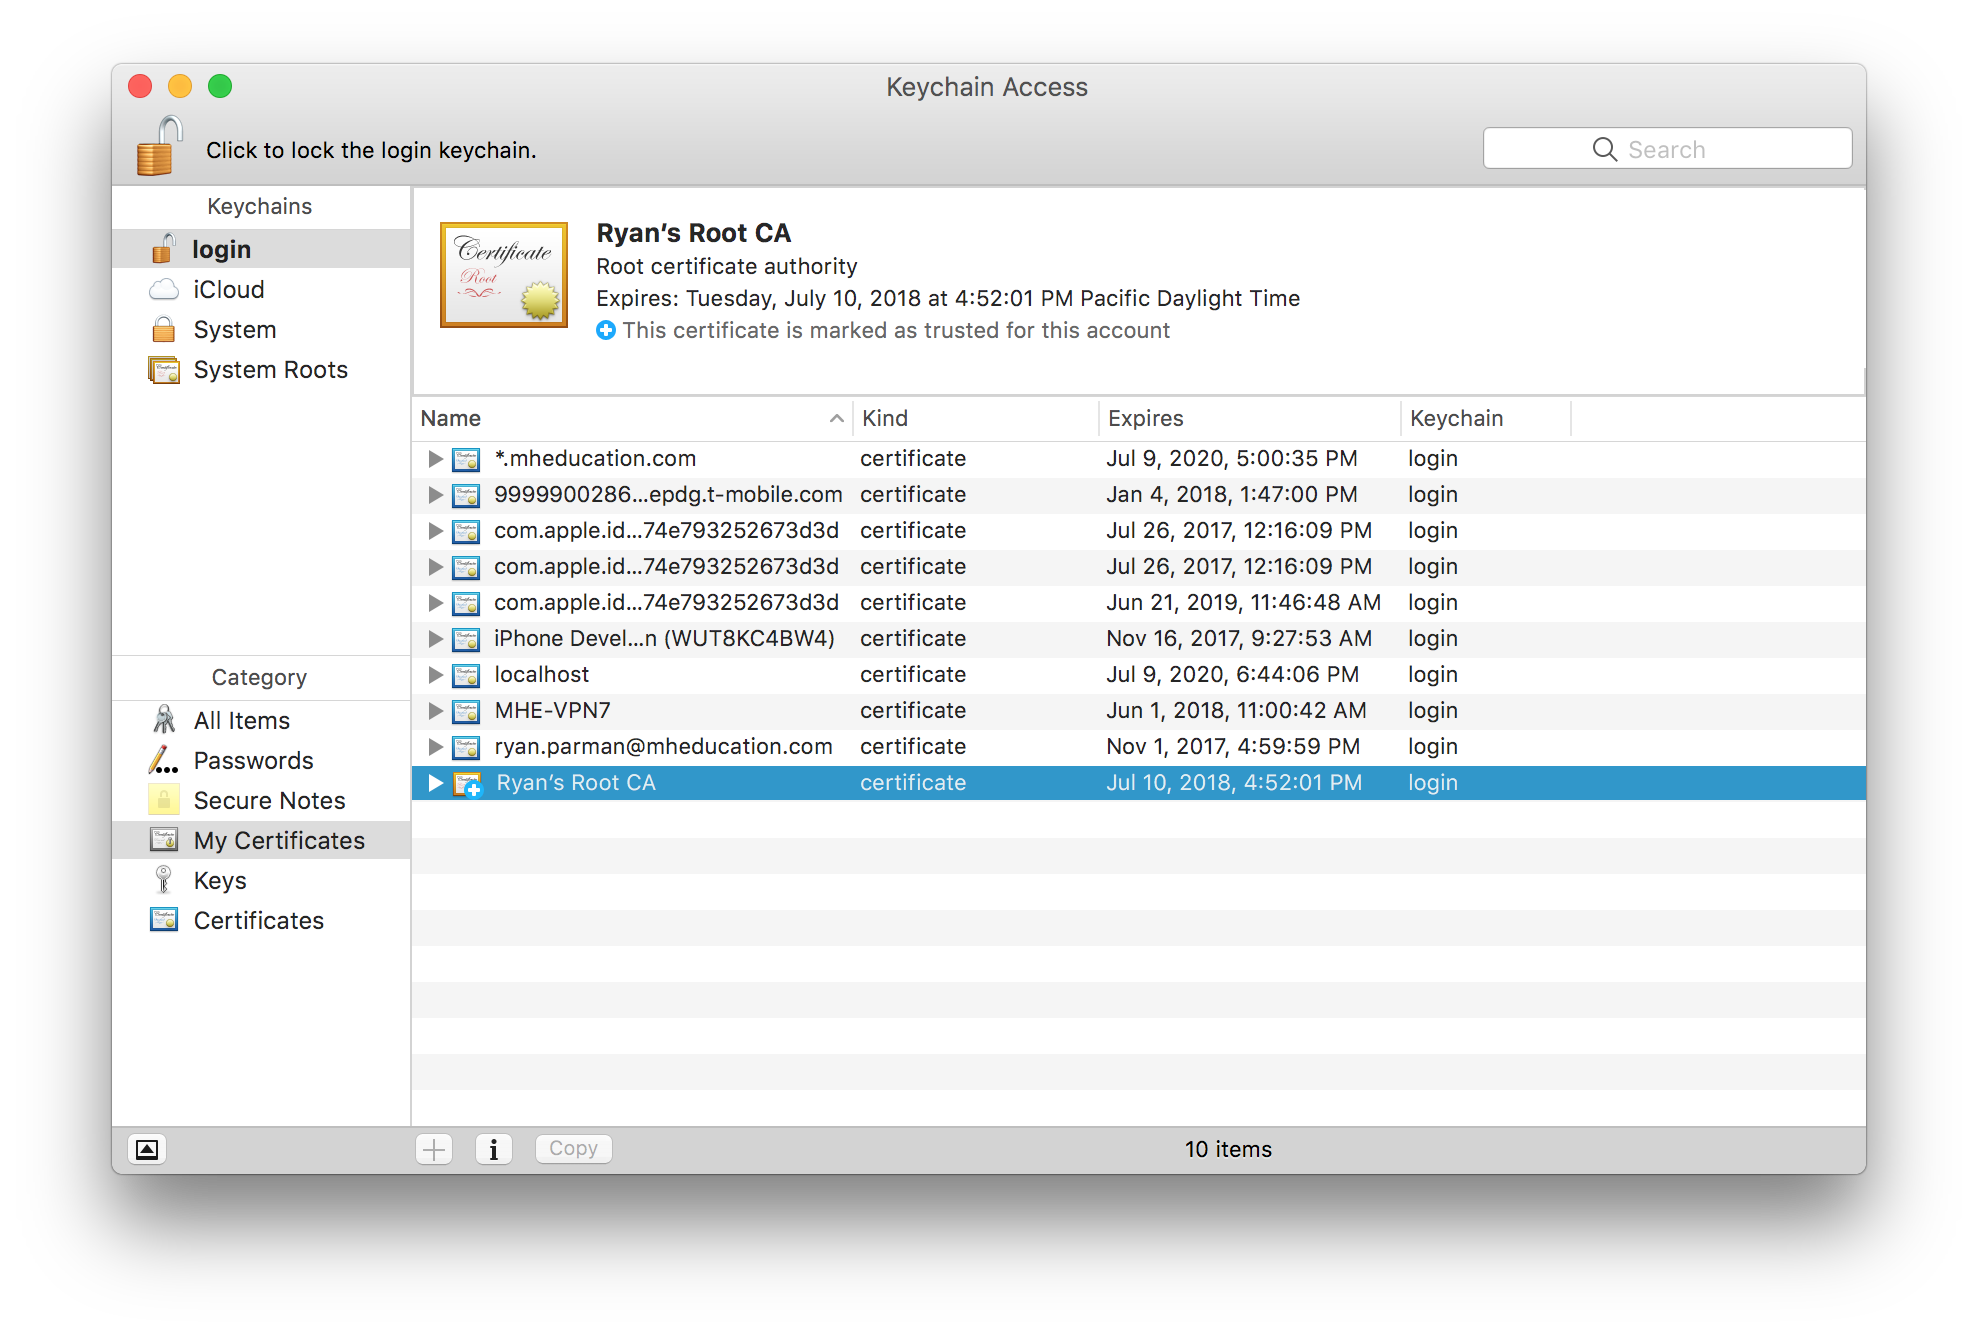
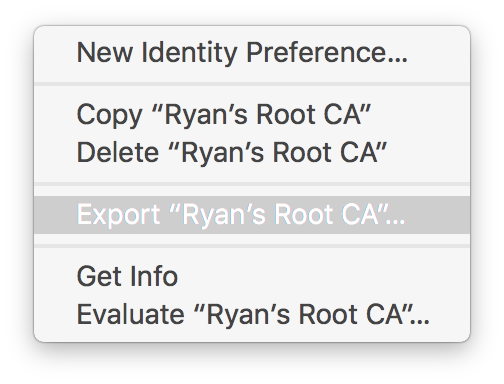
Right-click (or control-click, or two-finger click) the new CA, and choose Export….
You’ll see a Save As… dialog box, asking where you want to save your exported file. Type Command-Shift-G (⌘⇧G) to bring up a sub-dialog where you can enter the path that you want to traverse to.
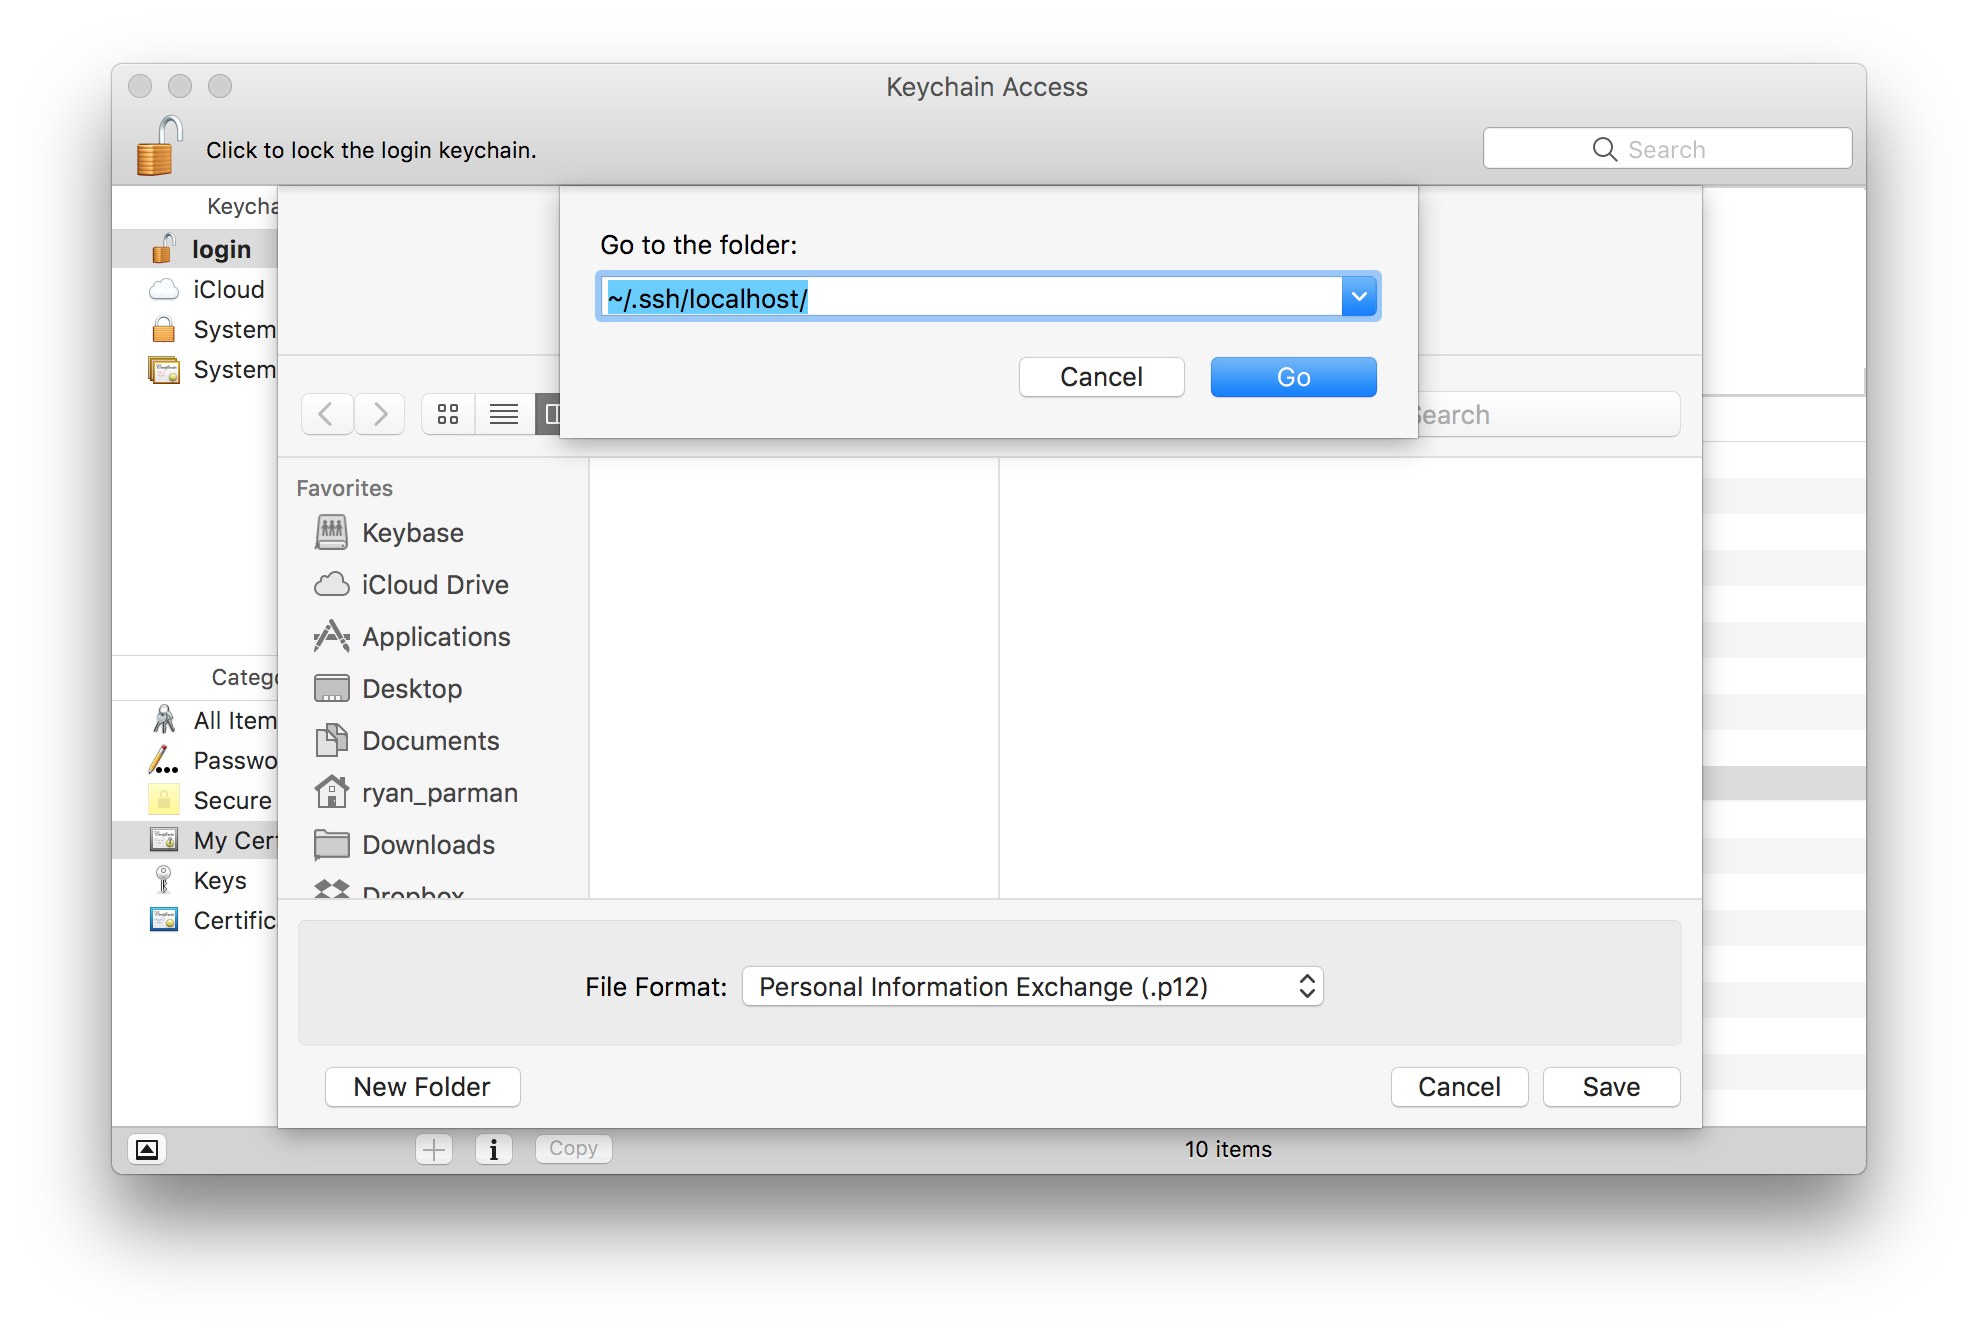
You can put the files anywhere you’d like, but in this example, I’m going to use ~/.ssh/localhost/.
Since this path doesn’t exist by default, you can enter ~/.ssh/, press Return, then choose the New Folder button along the bottom-left, and name it localhost.
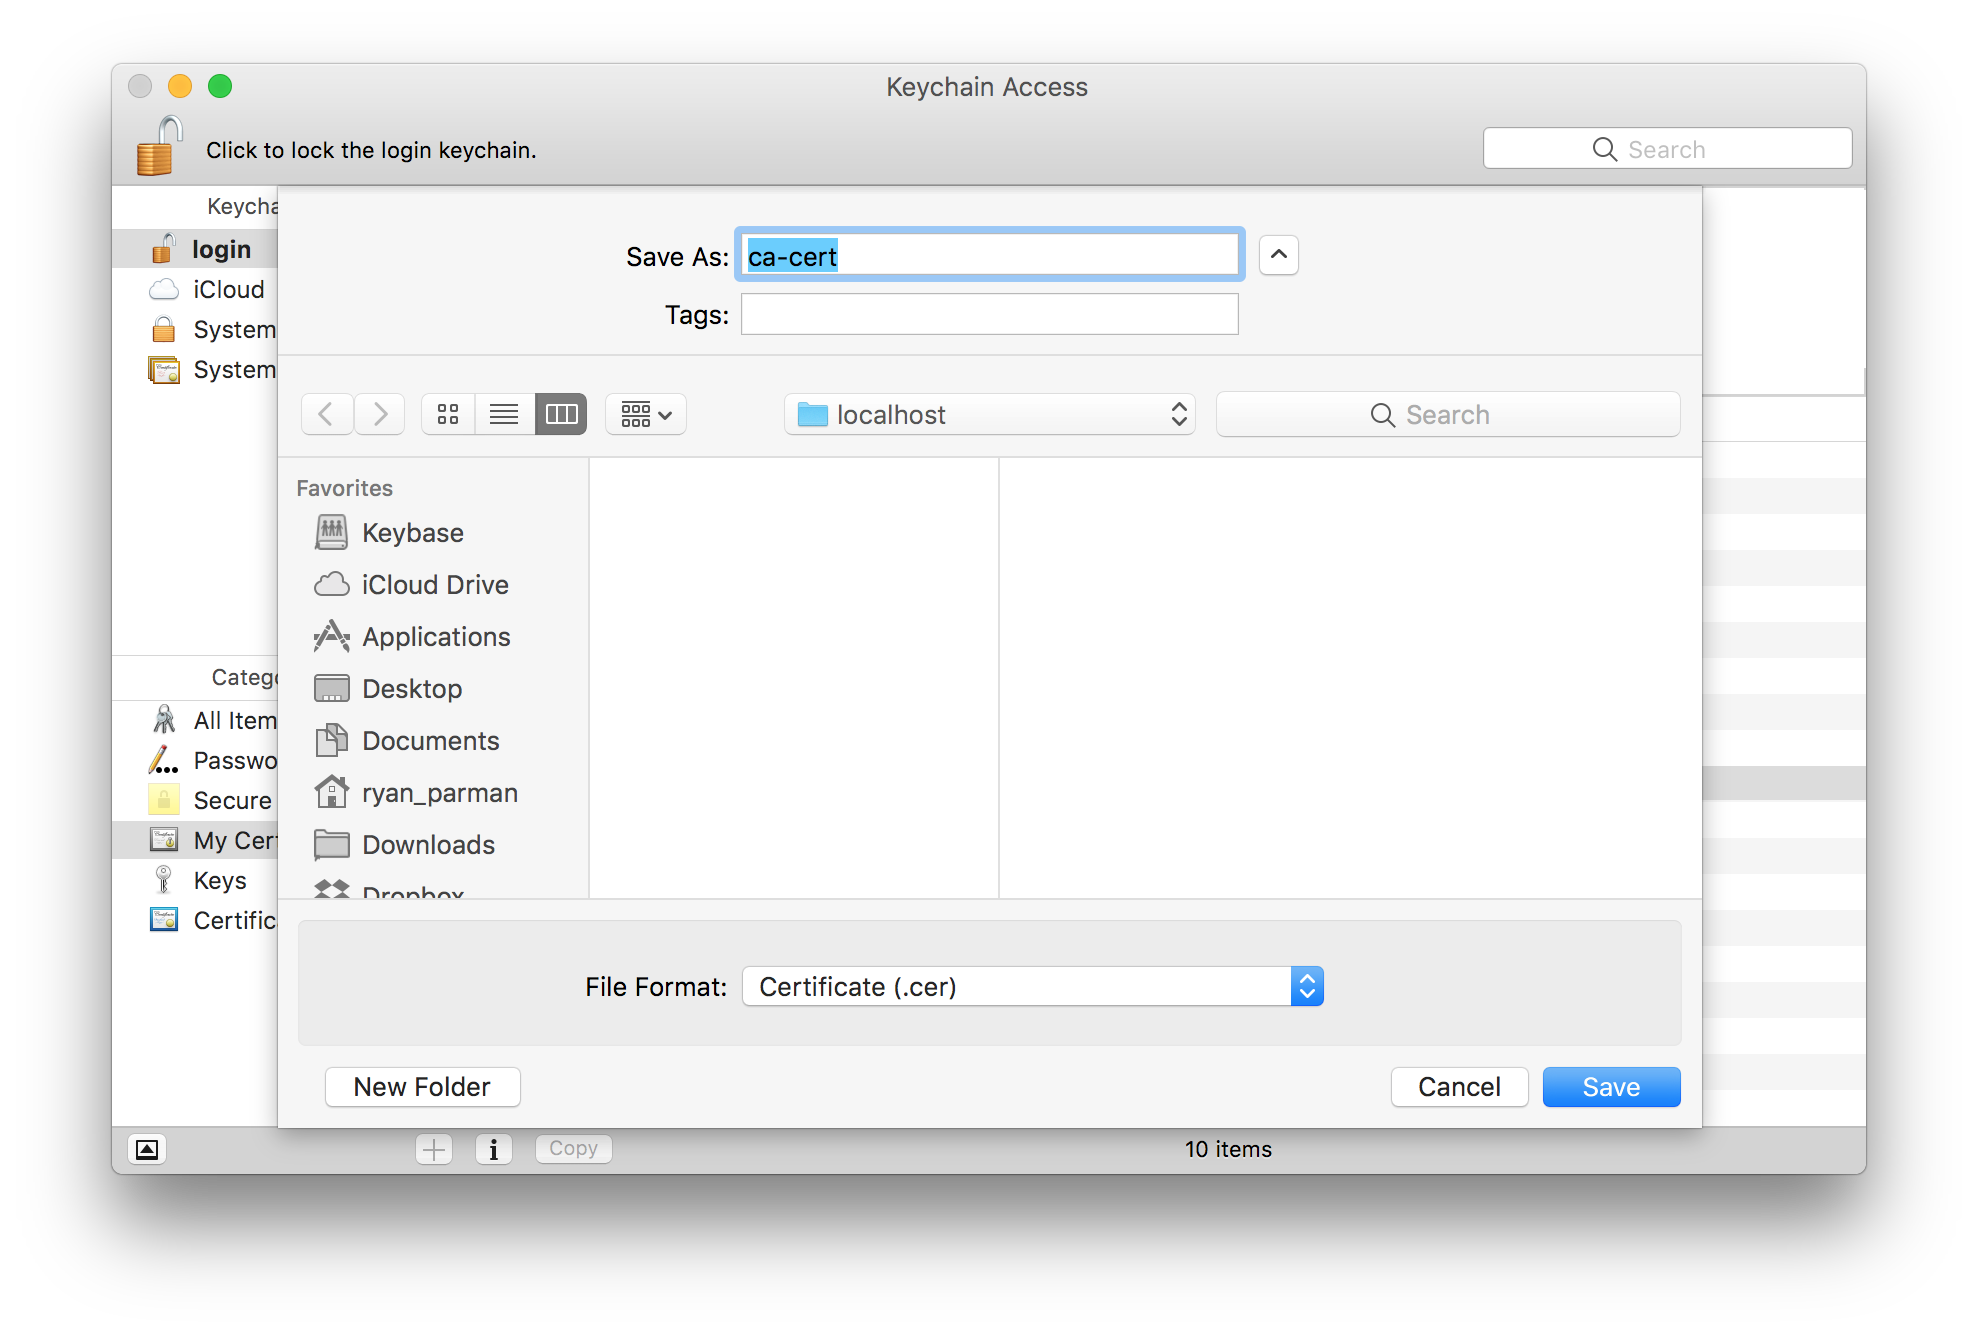
Again, you can give the file any name which makes sense to you. I’m going to use ca-cert in this example. For the File Format, choose Certificate (.cer).
When you’re done, choose the Save button.
Export your Certificate
Select your certificate.
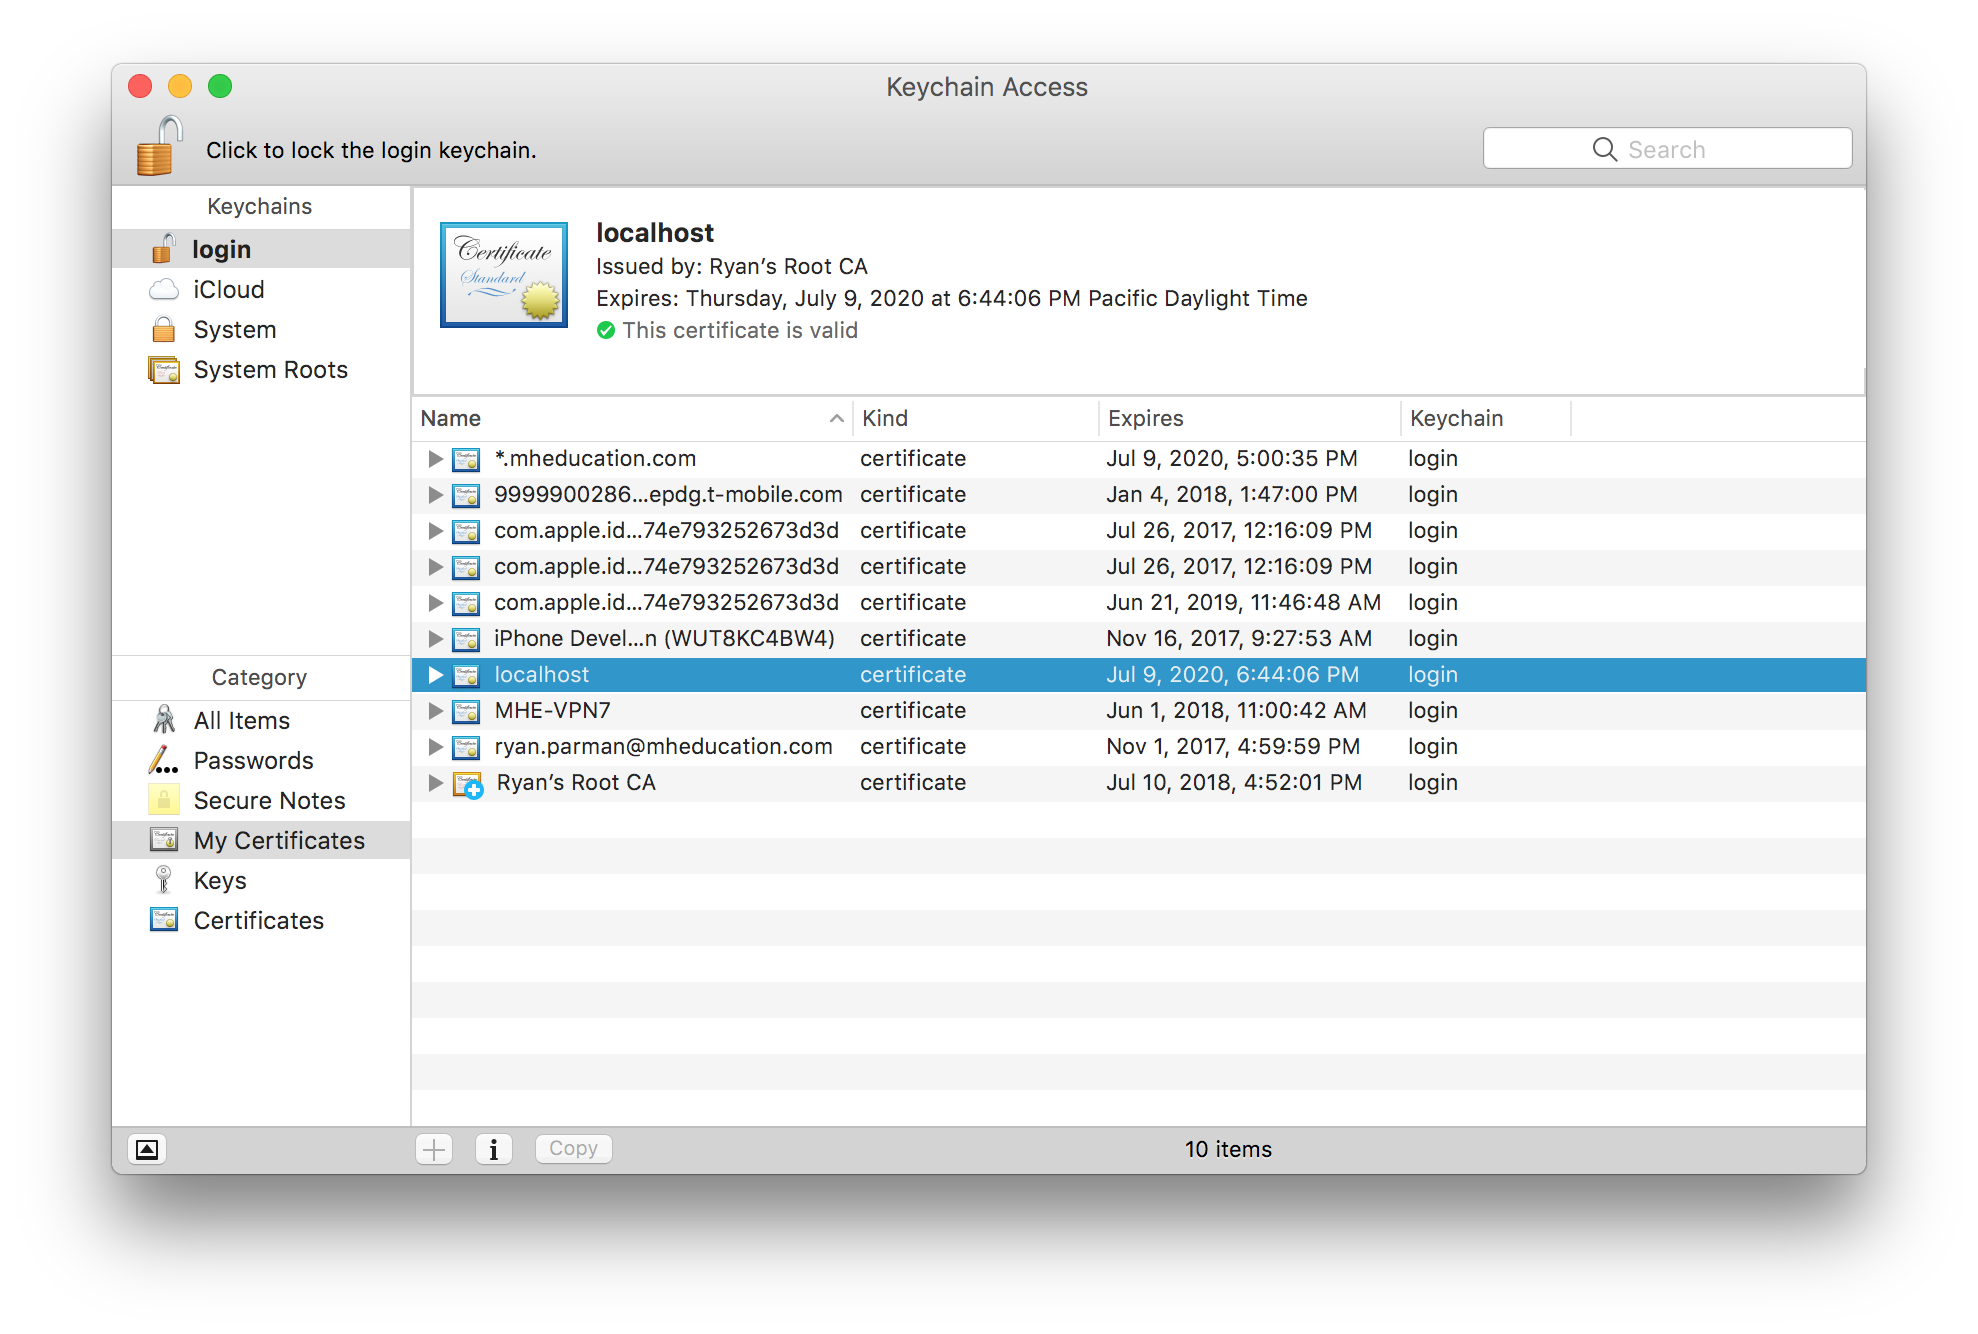
Right-click (or control-click, or two-finger click) the new certificate, and choose Export….
You’ll see a Save As… dialog box, asking where you want to save your exported file.
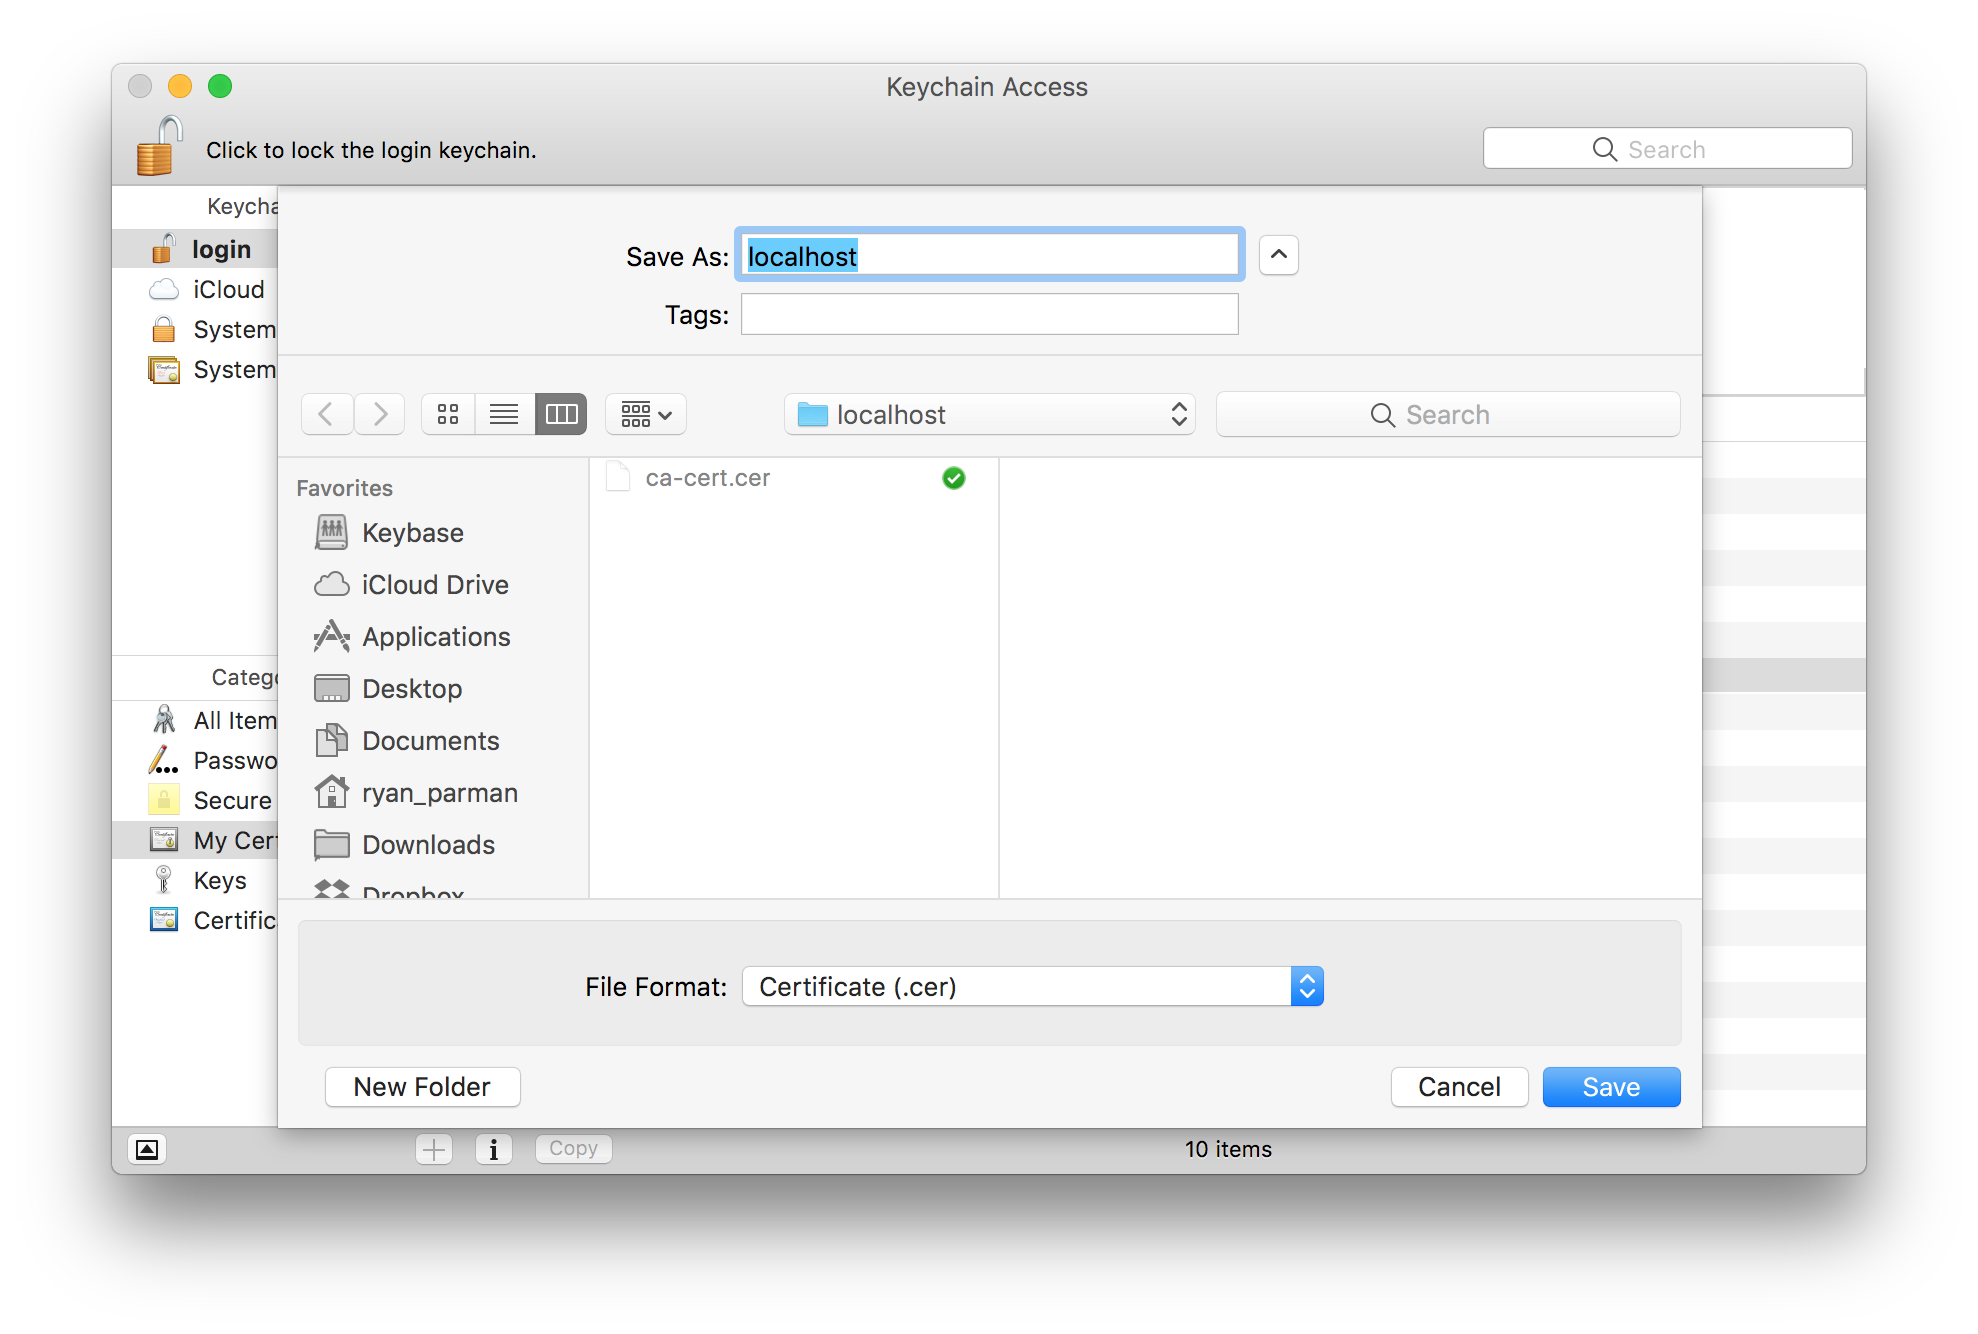
Again, you can give the file any name which makes sense to you. I would recommend giving the file the same name as the domain, e.g., localhost in this example. For the File Format, choose Certificate (.cer).
When you’re done, choose the Save button.
Export your Private Key
Select the private key for your certificate.
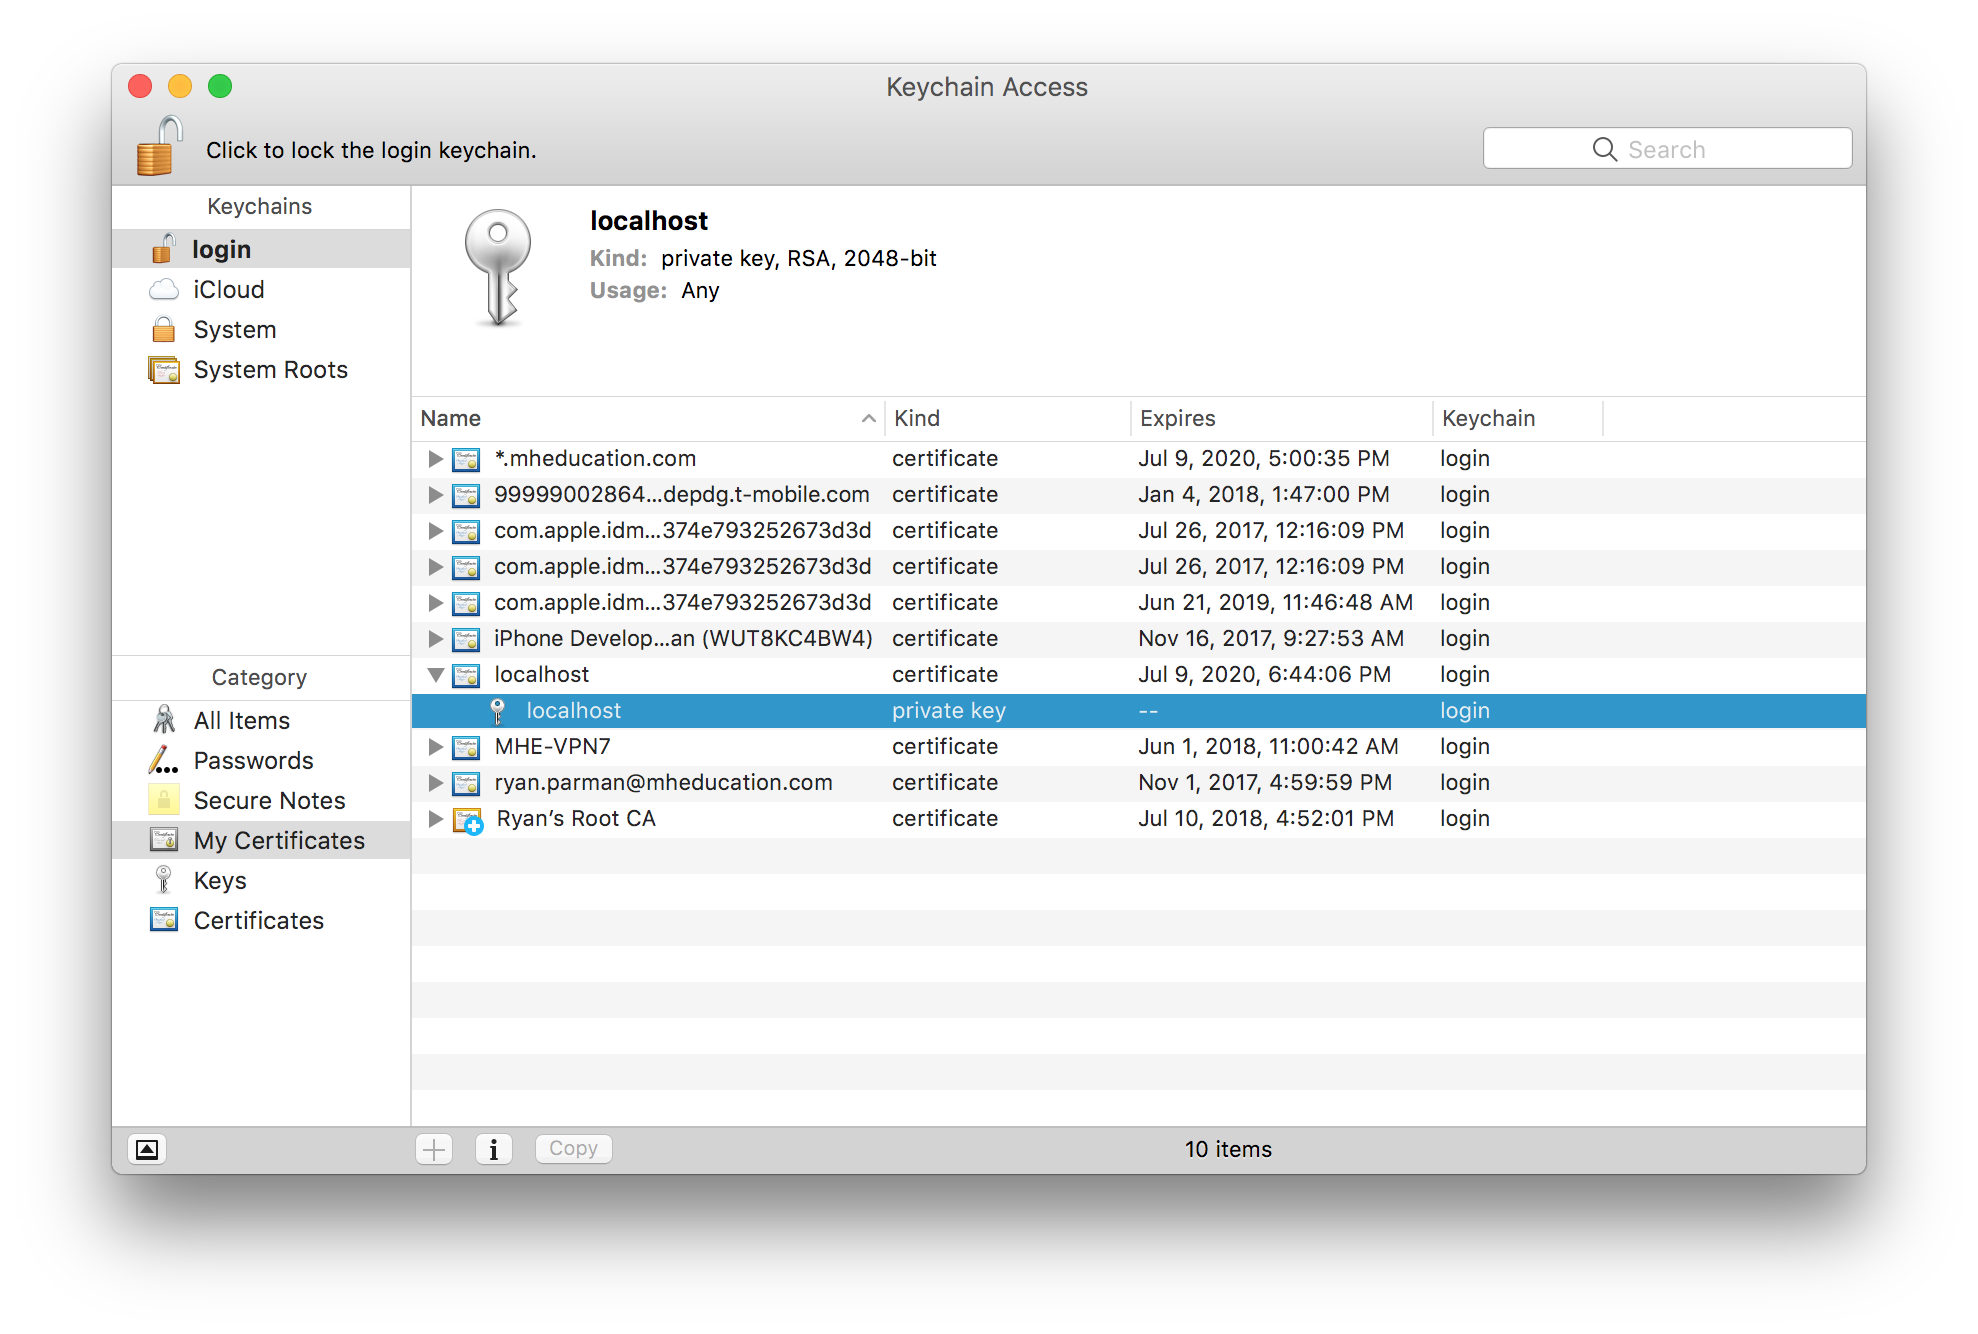
Right-click (or control-click, or two-finger click) the new private key, and choose Export….
You’ll see a Save As… dialog box, asking where you want to save your exported file.
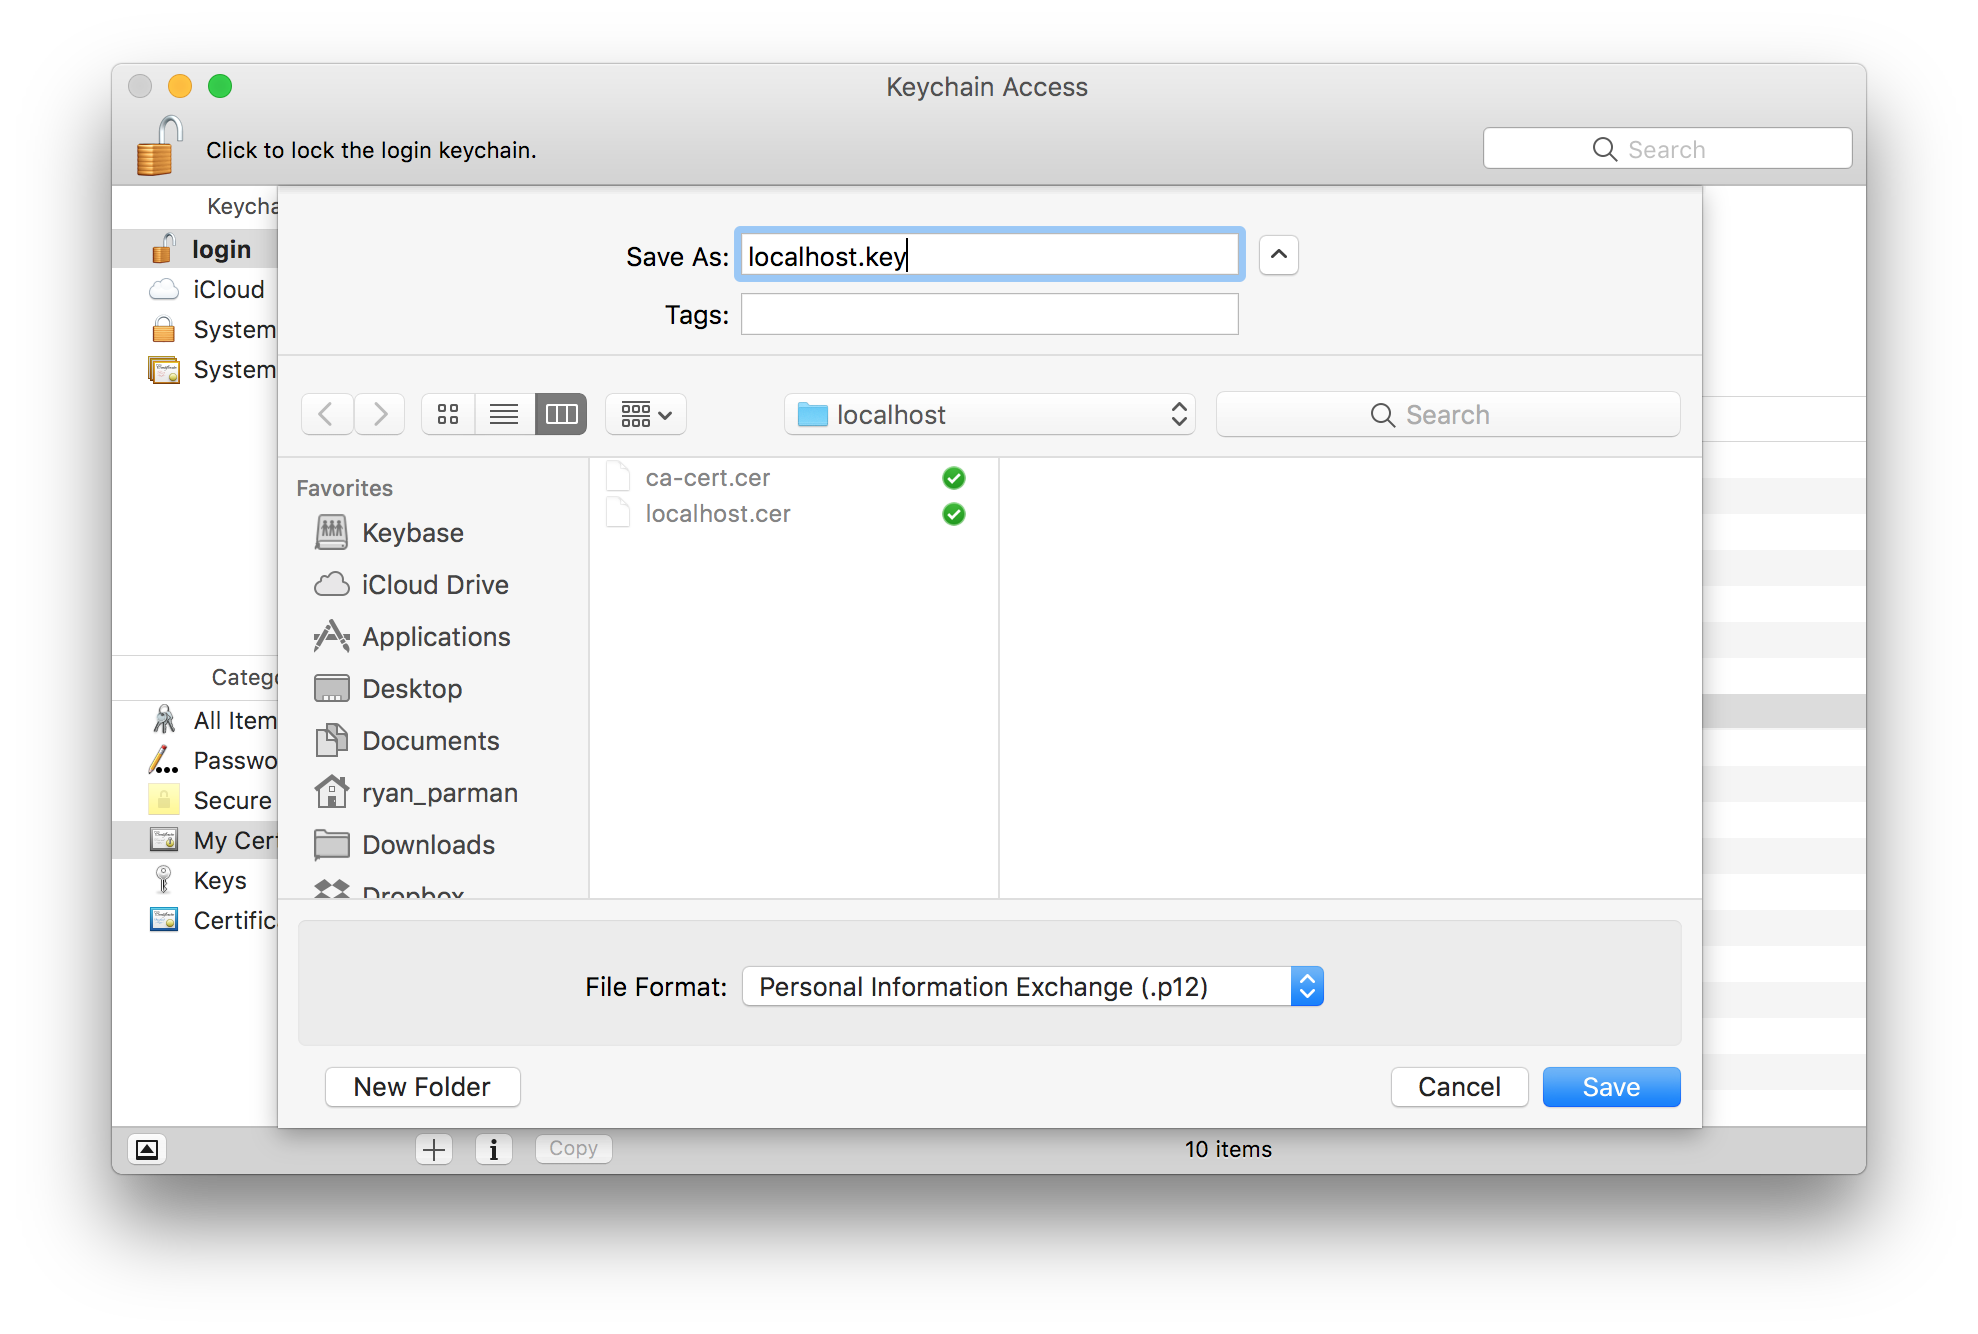
Again, you can give the file any name which makes sense to you. I would recommend giving the file the same name as the domain + .key, e.g., localhost.key in this example. For the File Format, choose Personal Information Exchange (.p12).
When you’re done, choose the Save button. You will probably see a dialog which complains about the file extension.
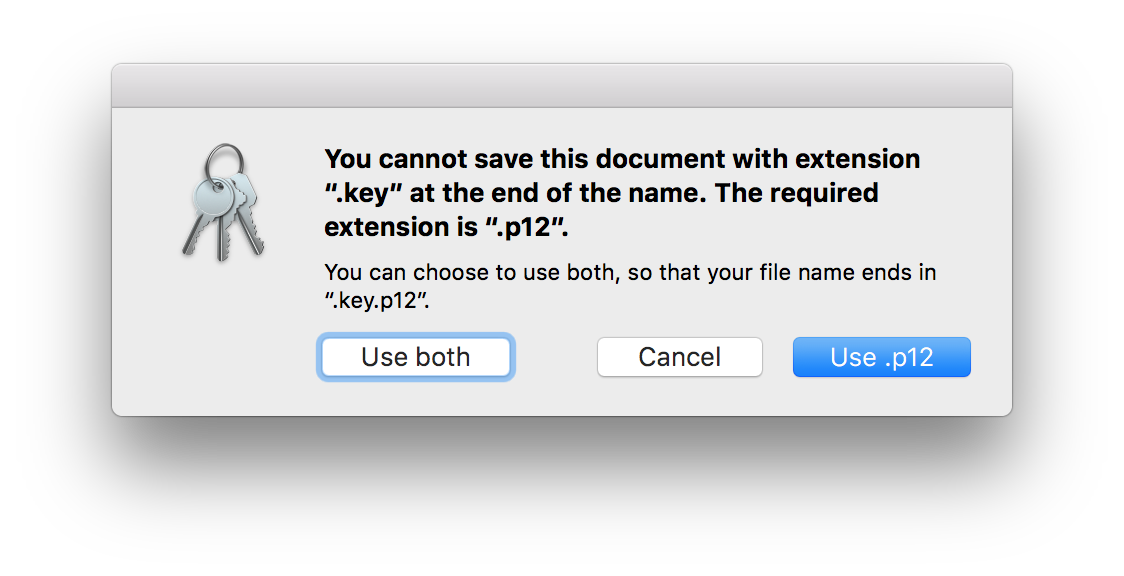
Choose Use both.
Converting Files into PEM Format
Open Terminal, and navigate to the directory where we saved our exported files.
cd ~/.ssh/localhost/
We’re going to use the openssl command to convert our exported files into the widely-supported PEM format.
Convert the Private Key from P12 → PEM
openssl pkcs12 -in localhost.key.p12 -nocerts -nodes | openssl rsa > localhost.key.pem
Convert the Certificate from CER → PEM
openssl x509 -inform der -in localhost.cer -out localhost.cer.pem
Convert the root CA from CER → PEM
openssl x509 -inform der -in ca-cert.cer -out ca-cert.cer.pem
Confirming Files
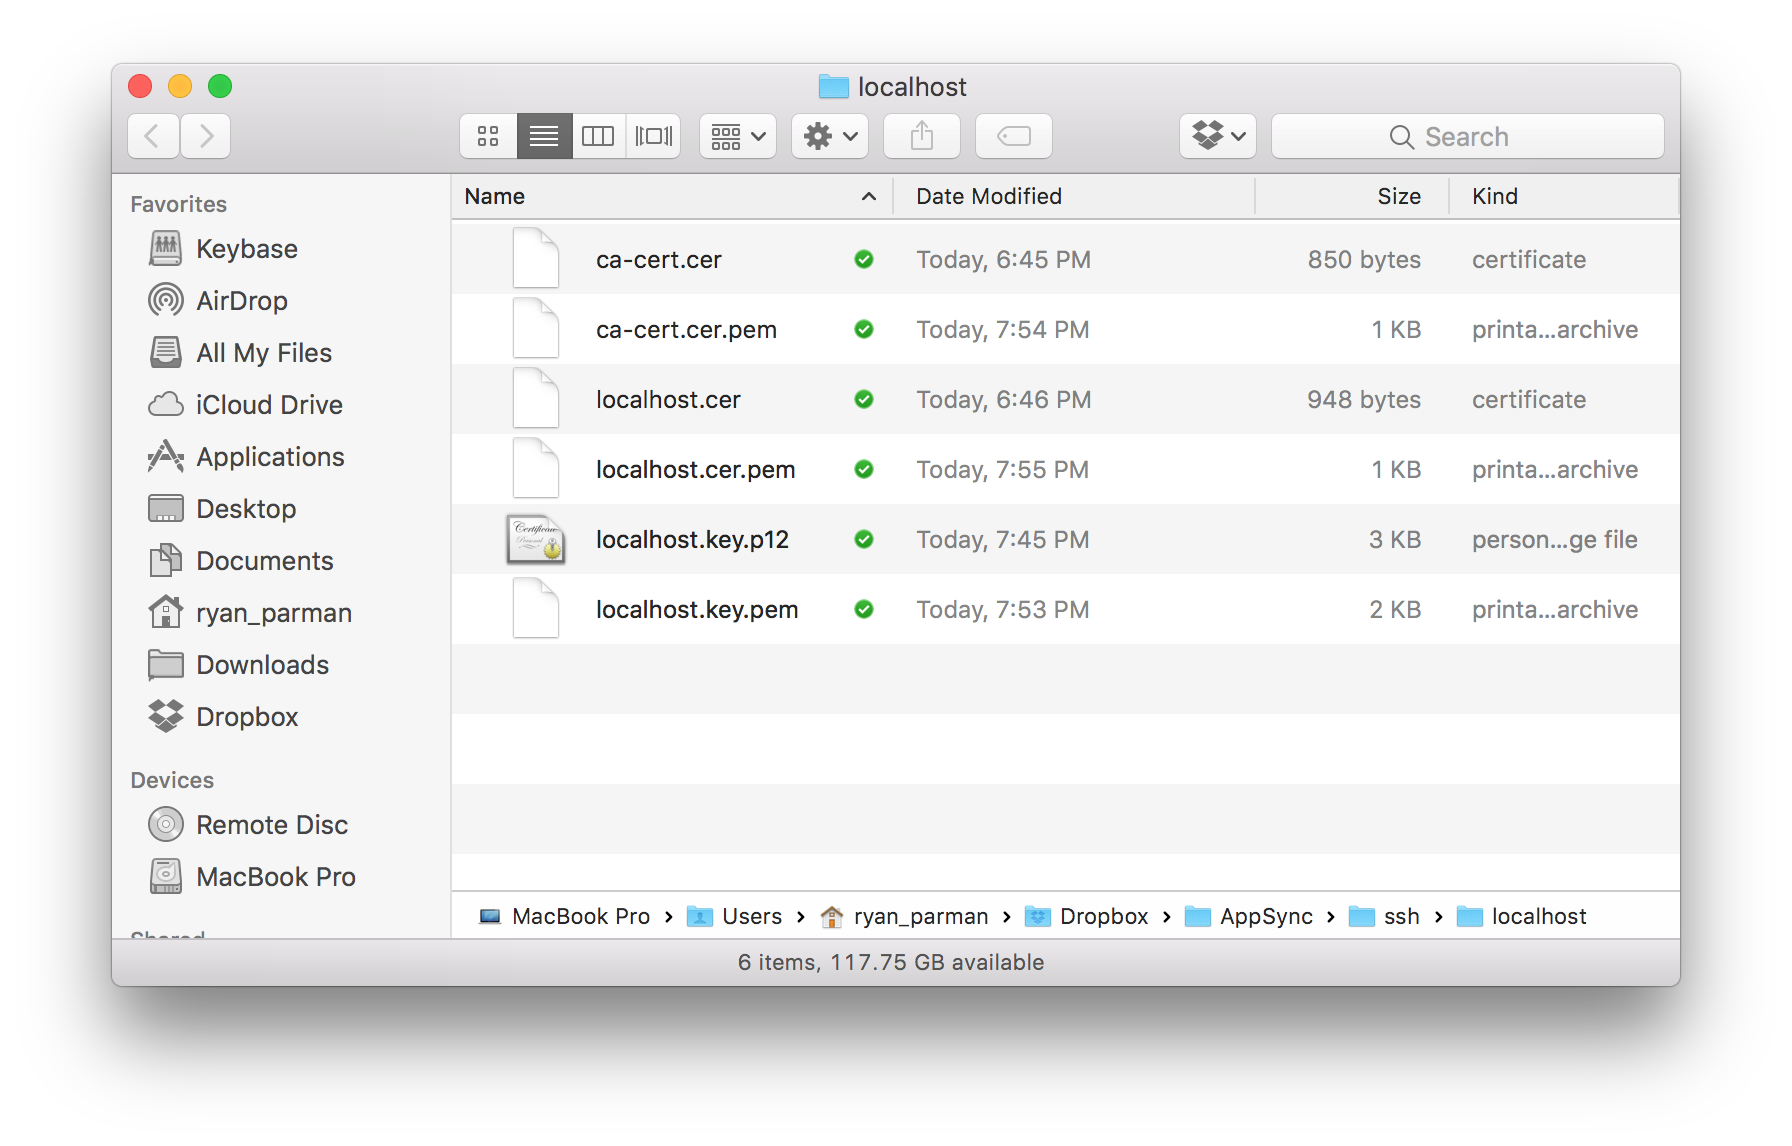
Putting these Certificates to Use
You now have a root CA, a certificate, and a private key that can be used on your local machine for faux-HTTPS connections.
As an example for how these can be used, we’ll install the http-server package from npm. (You’ll need Node.js installed; See Install npm packages globally without sudo on macOS and Linux for how to do this without sudo.)
Installing http-server
npm install -g http-server
After the package is installed, you can run a local HTTPS server using the contents of the current directory.
http-server --ssl \
    --cert ~/.ssh/localhost/localhost.cer.pem \
    --key ~/.ssh/localhost/localhost.key.pem \
    -p 8443
Now you can open https://localhost:8443 in your web browser.
Pretending to be another website, locally
Let’s say that you want to pretend to be fake.google.com, locally.
Perhaps you’re testing something with CORS, or cookies, or something else where the domain name matters.
-
After creating your root CA, create a new certificate where the common name is
*.google.com. (Again, this will only work on your local machine.) Follow the same instructions you followed forlocalhost. -
Run
http-serverusing your new fake*.google.comcertificates. But instead, run it on port443. Since the port that we want to bind to is smaller than 1000, we’ll need to usesudo.sudo http-server --ssl \ --cert ~/.ssh/localhost/star.google.cer.pem \ --key ~/.ssh/localhost/star.google.key.pem \ -p 443 -
In your
/etc/hostsfile, add a line that says127.0.0.1 fake.google.com. -
In your web browser, visit https://fake.google.com and you’ll see that it loads successfully. However, if you click on the lock in the address bar and view the certificate, you’ll see that the certificate was issued by your own custom root CA.